Assignments
Pro feature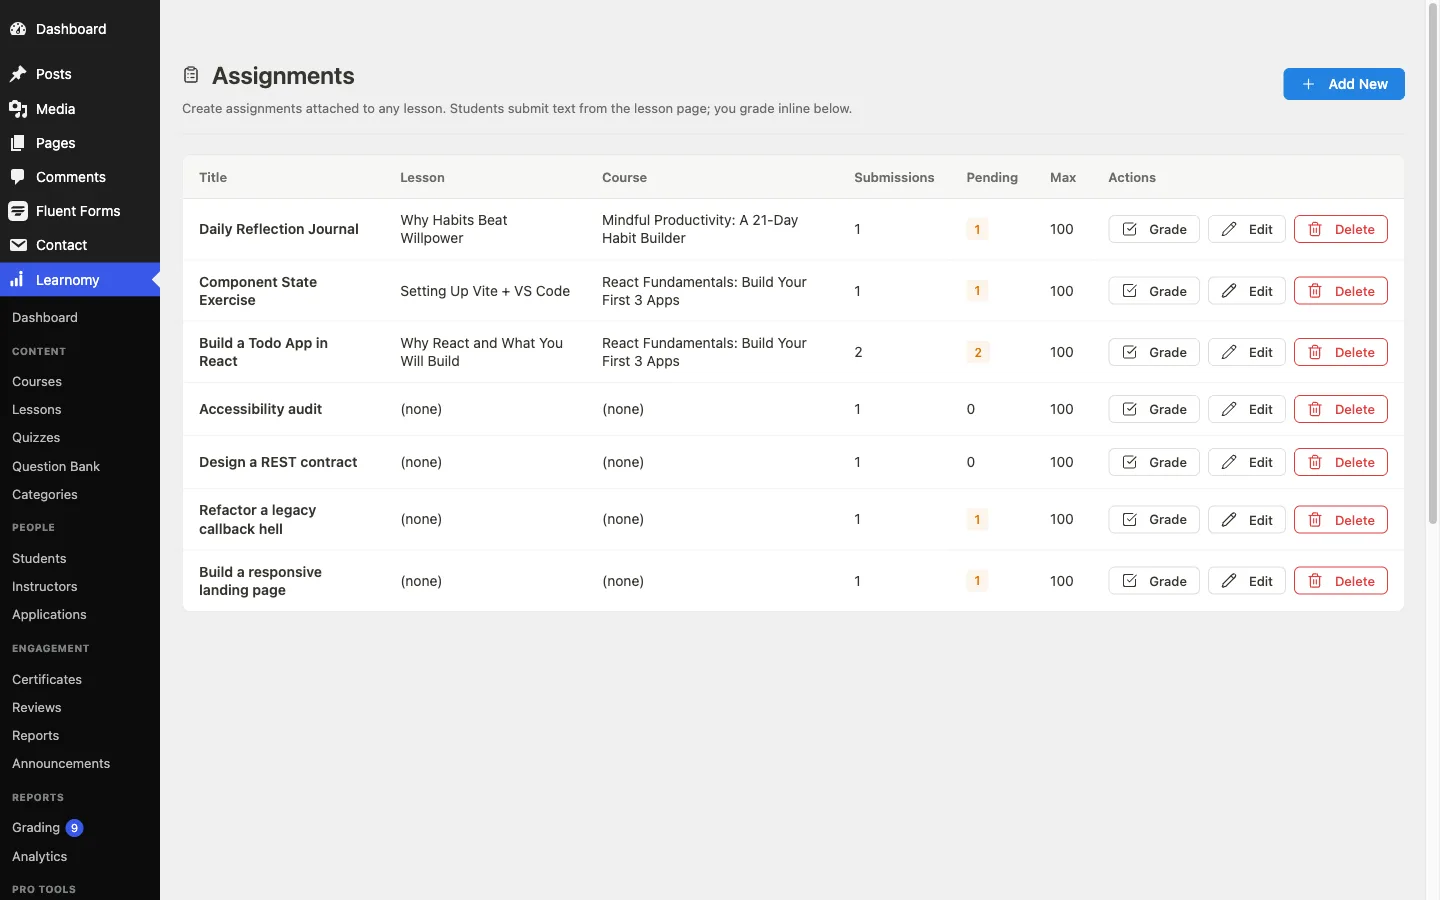
🔶 Pro feature. Available in Learnomy Pro.
Assignments attach written tasks to any lesson. An enrolled student sees the assignment widget below the lesson content, writes their response, and submits it. You then review each submission and award a numeric score with optional feedback. The student sees the result the next time they open the lesson.
Overview
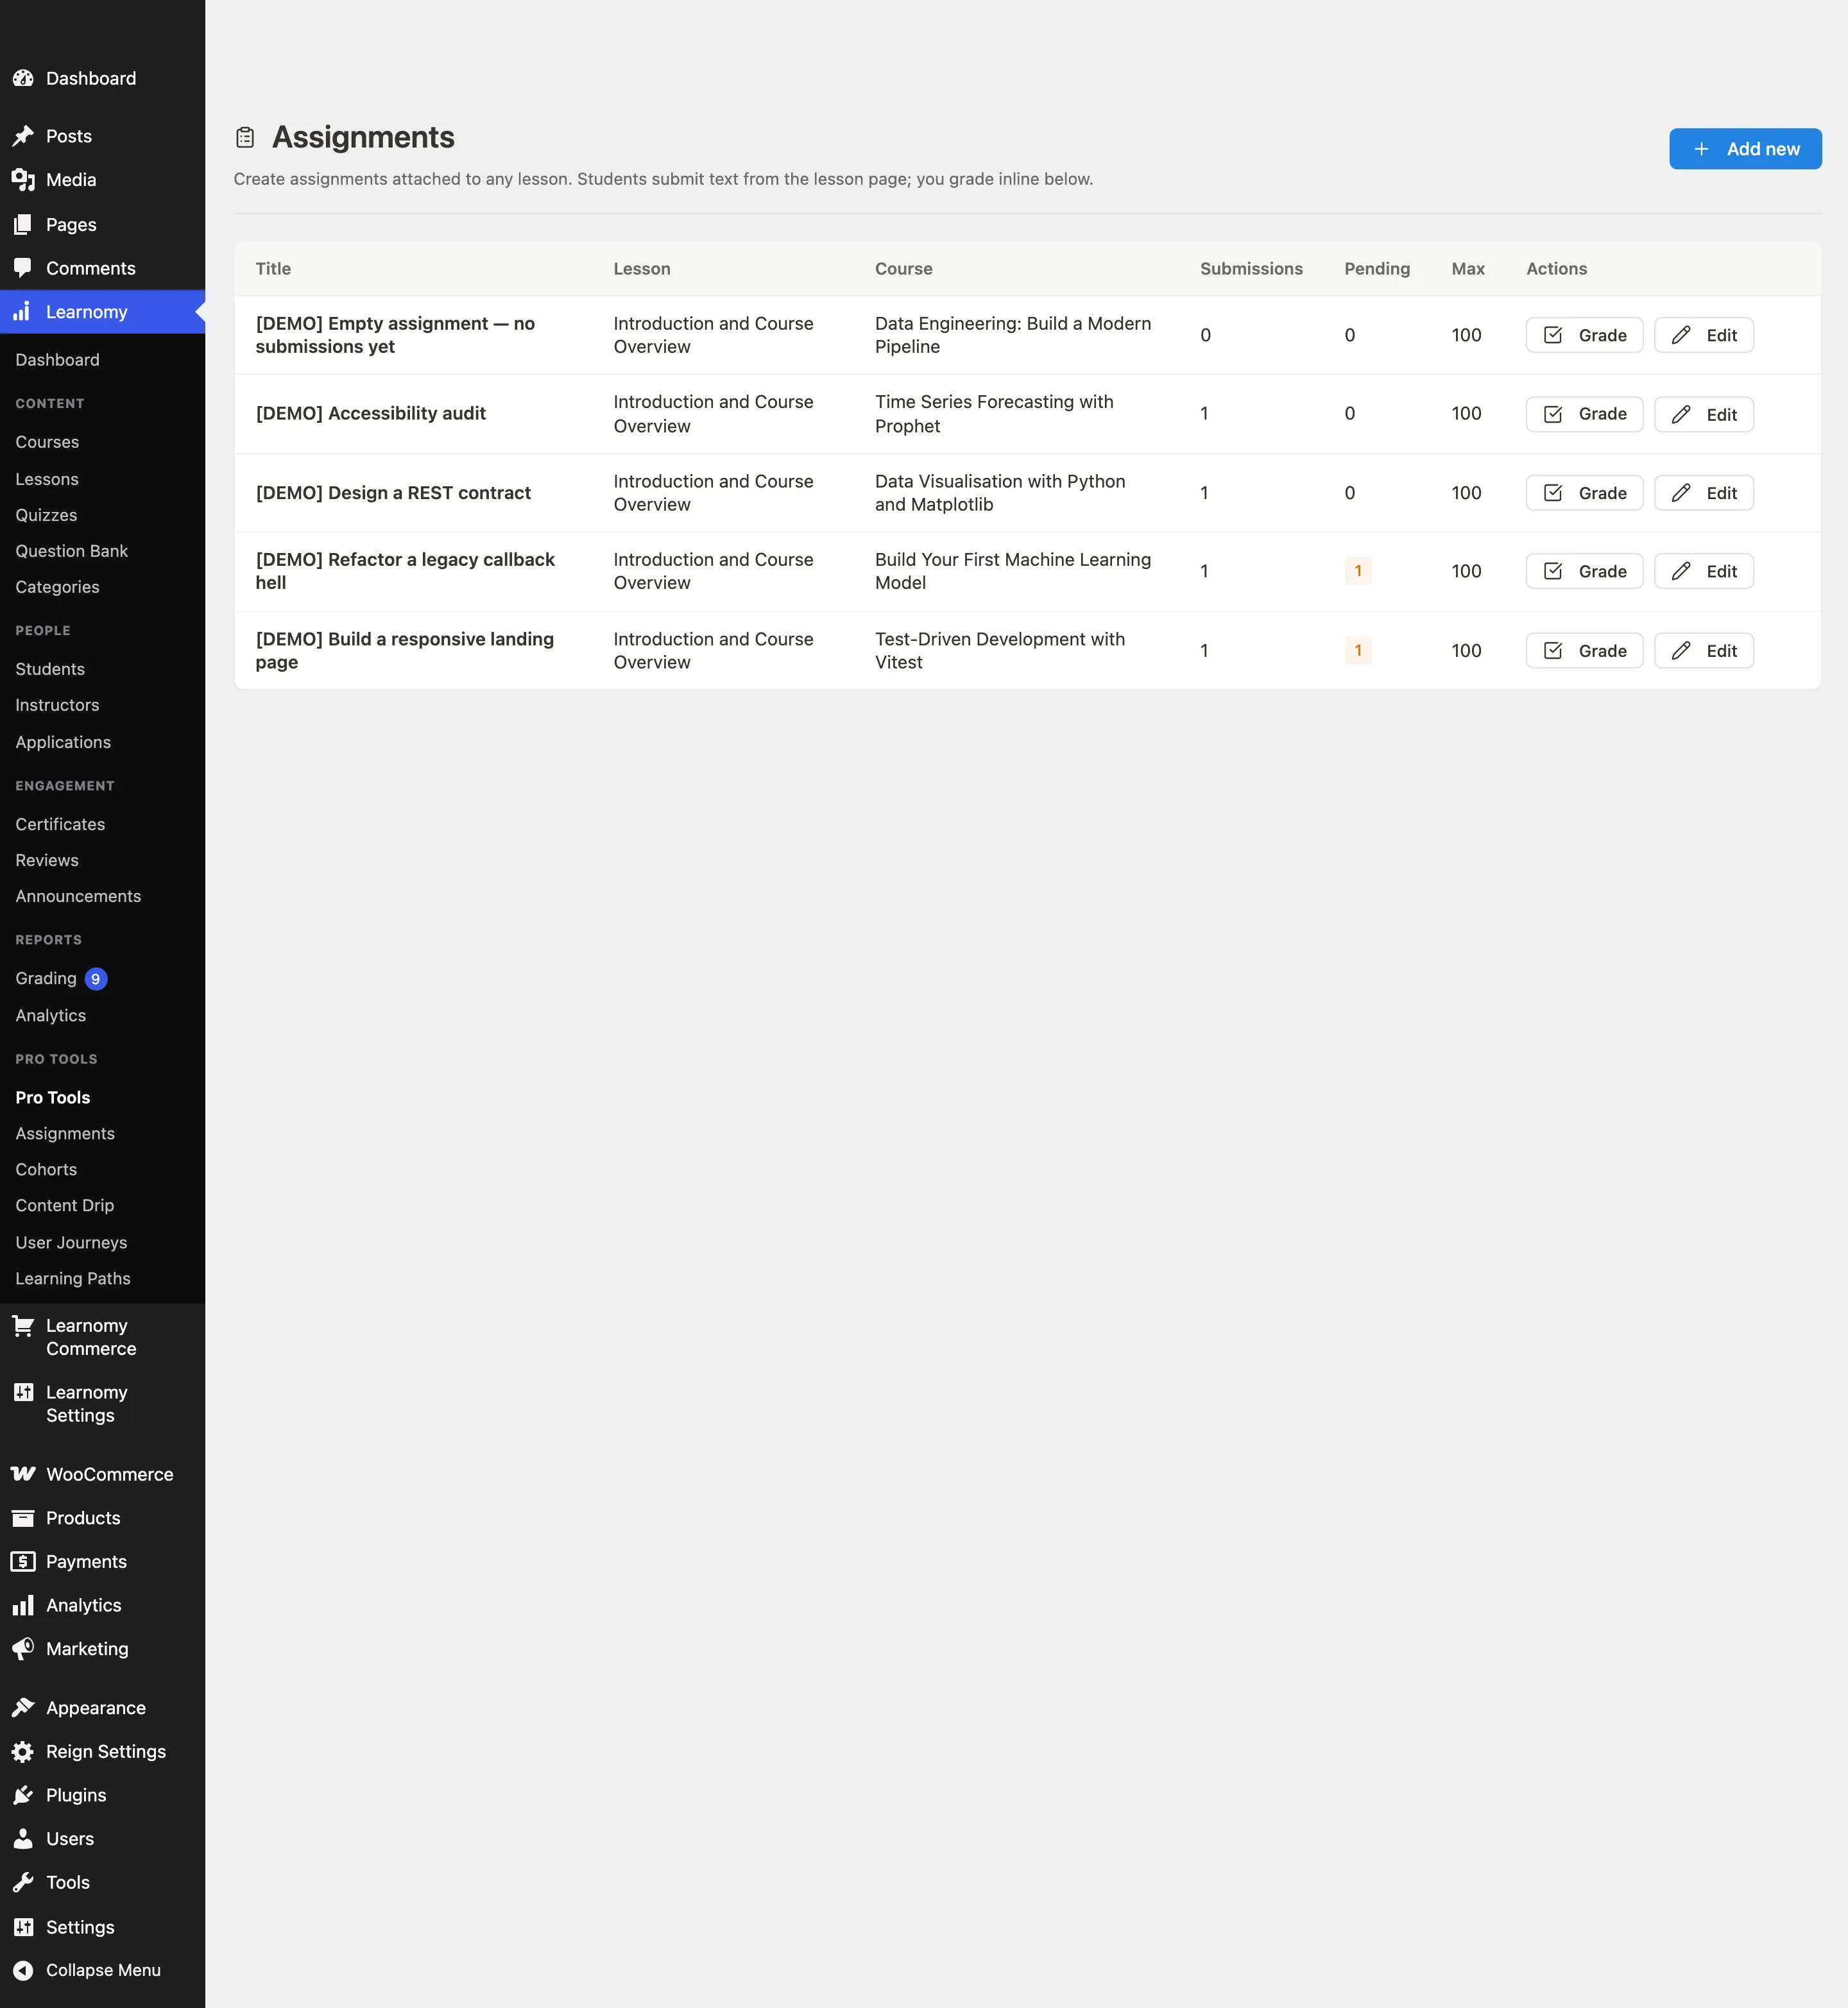
Go to Learnomy > Pro Tools > Assignments to see all assignments. The table shows each assignment's title, the lesson and course it is attached to, the total submission count, and how many submissions are pending grading.
Creating an assignment
Click Add new. The create form slides into view above the table.

Fill in the fields:
- Assignment title - a short description of the task, for example "Write a 300-word reflection".
- Lesson - select any lesson from the dropdown. Only one assignment can be attached to each lesson.
- Max score - the maximum numeric score for this assignment (for example, 100).
- Due date - optional. When set, the due date appears in the student widget and is enforced: submissions after the deadline are rejected. The due date is a calendar day, and it is evaluated in your site's timezone: a "Due July 10" assignment keeps accepting work through 23:59:59 on July 10, site-local time, not midnight UTC.
- Reference files - optional. Attach a brief, starter files, or a rubric from the media library. Students see these as Reference files on the lesson, alongside the assignment instructions, regardless of whether they have submitted yet.
Click Save assignment. The assignment is now active on the selected lesson for all enrolled students.
You can also add or edit the assignment attached to a lesson from the lesson editor itself, in the Assignment panel next to the lesson's release settings.
The student experience
An enrolled student opens the lesson. The assignment widget appears below the lesson content, showing the instructions and any Reference files or Reference links the instructor attached.
The student types their submission text into the text area. They can attach it two ways, and can use both on the same submission:
- Attach files (optional) - upload one or more files from their device, up to the maximum the site owner configured.
- Add a link (optional) - paste a video, audio, or document URL instead of uploading a large file. This is meant for content that already lives somewhere else, like a hosted screen recording or a Google Doc.
The student clicks Submit. The widget immediately shows a Submitted, awaiting grade confirmation, with an expandable "Show what you submitted" section listing their submitted files and links.
After grading, the student returns to the lesson and sees their score (for example, 78 / 100), the instructor's feedback, and their submitted files and links in the widget. The same feedback also appears on the account Assignments page (My Account > Assignments), which lists every assignment the student has upcoming or submitted across all their courses.
If an instructor requests a resubmission instead of grading, the widget shows a Resubmission requested notice with the instructor's note, and the submission form reopens even if the original due date has passed - the resubmission request supersedes the deadline.
In the mobile app
Students can also check their assignment status in the mobile app. It shows the same submission status, score, and feedback as the website, refreshed each time the student opens the assignment.
Grading submissions
From the Assignments list, click Grade in the row for an assignment that has pending submissions. You land on the grader view for that assignment.
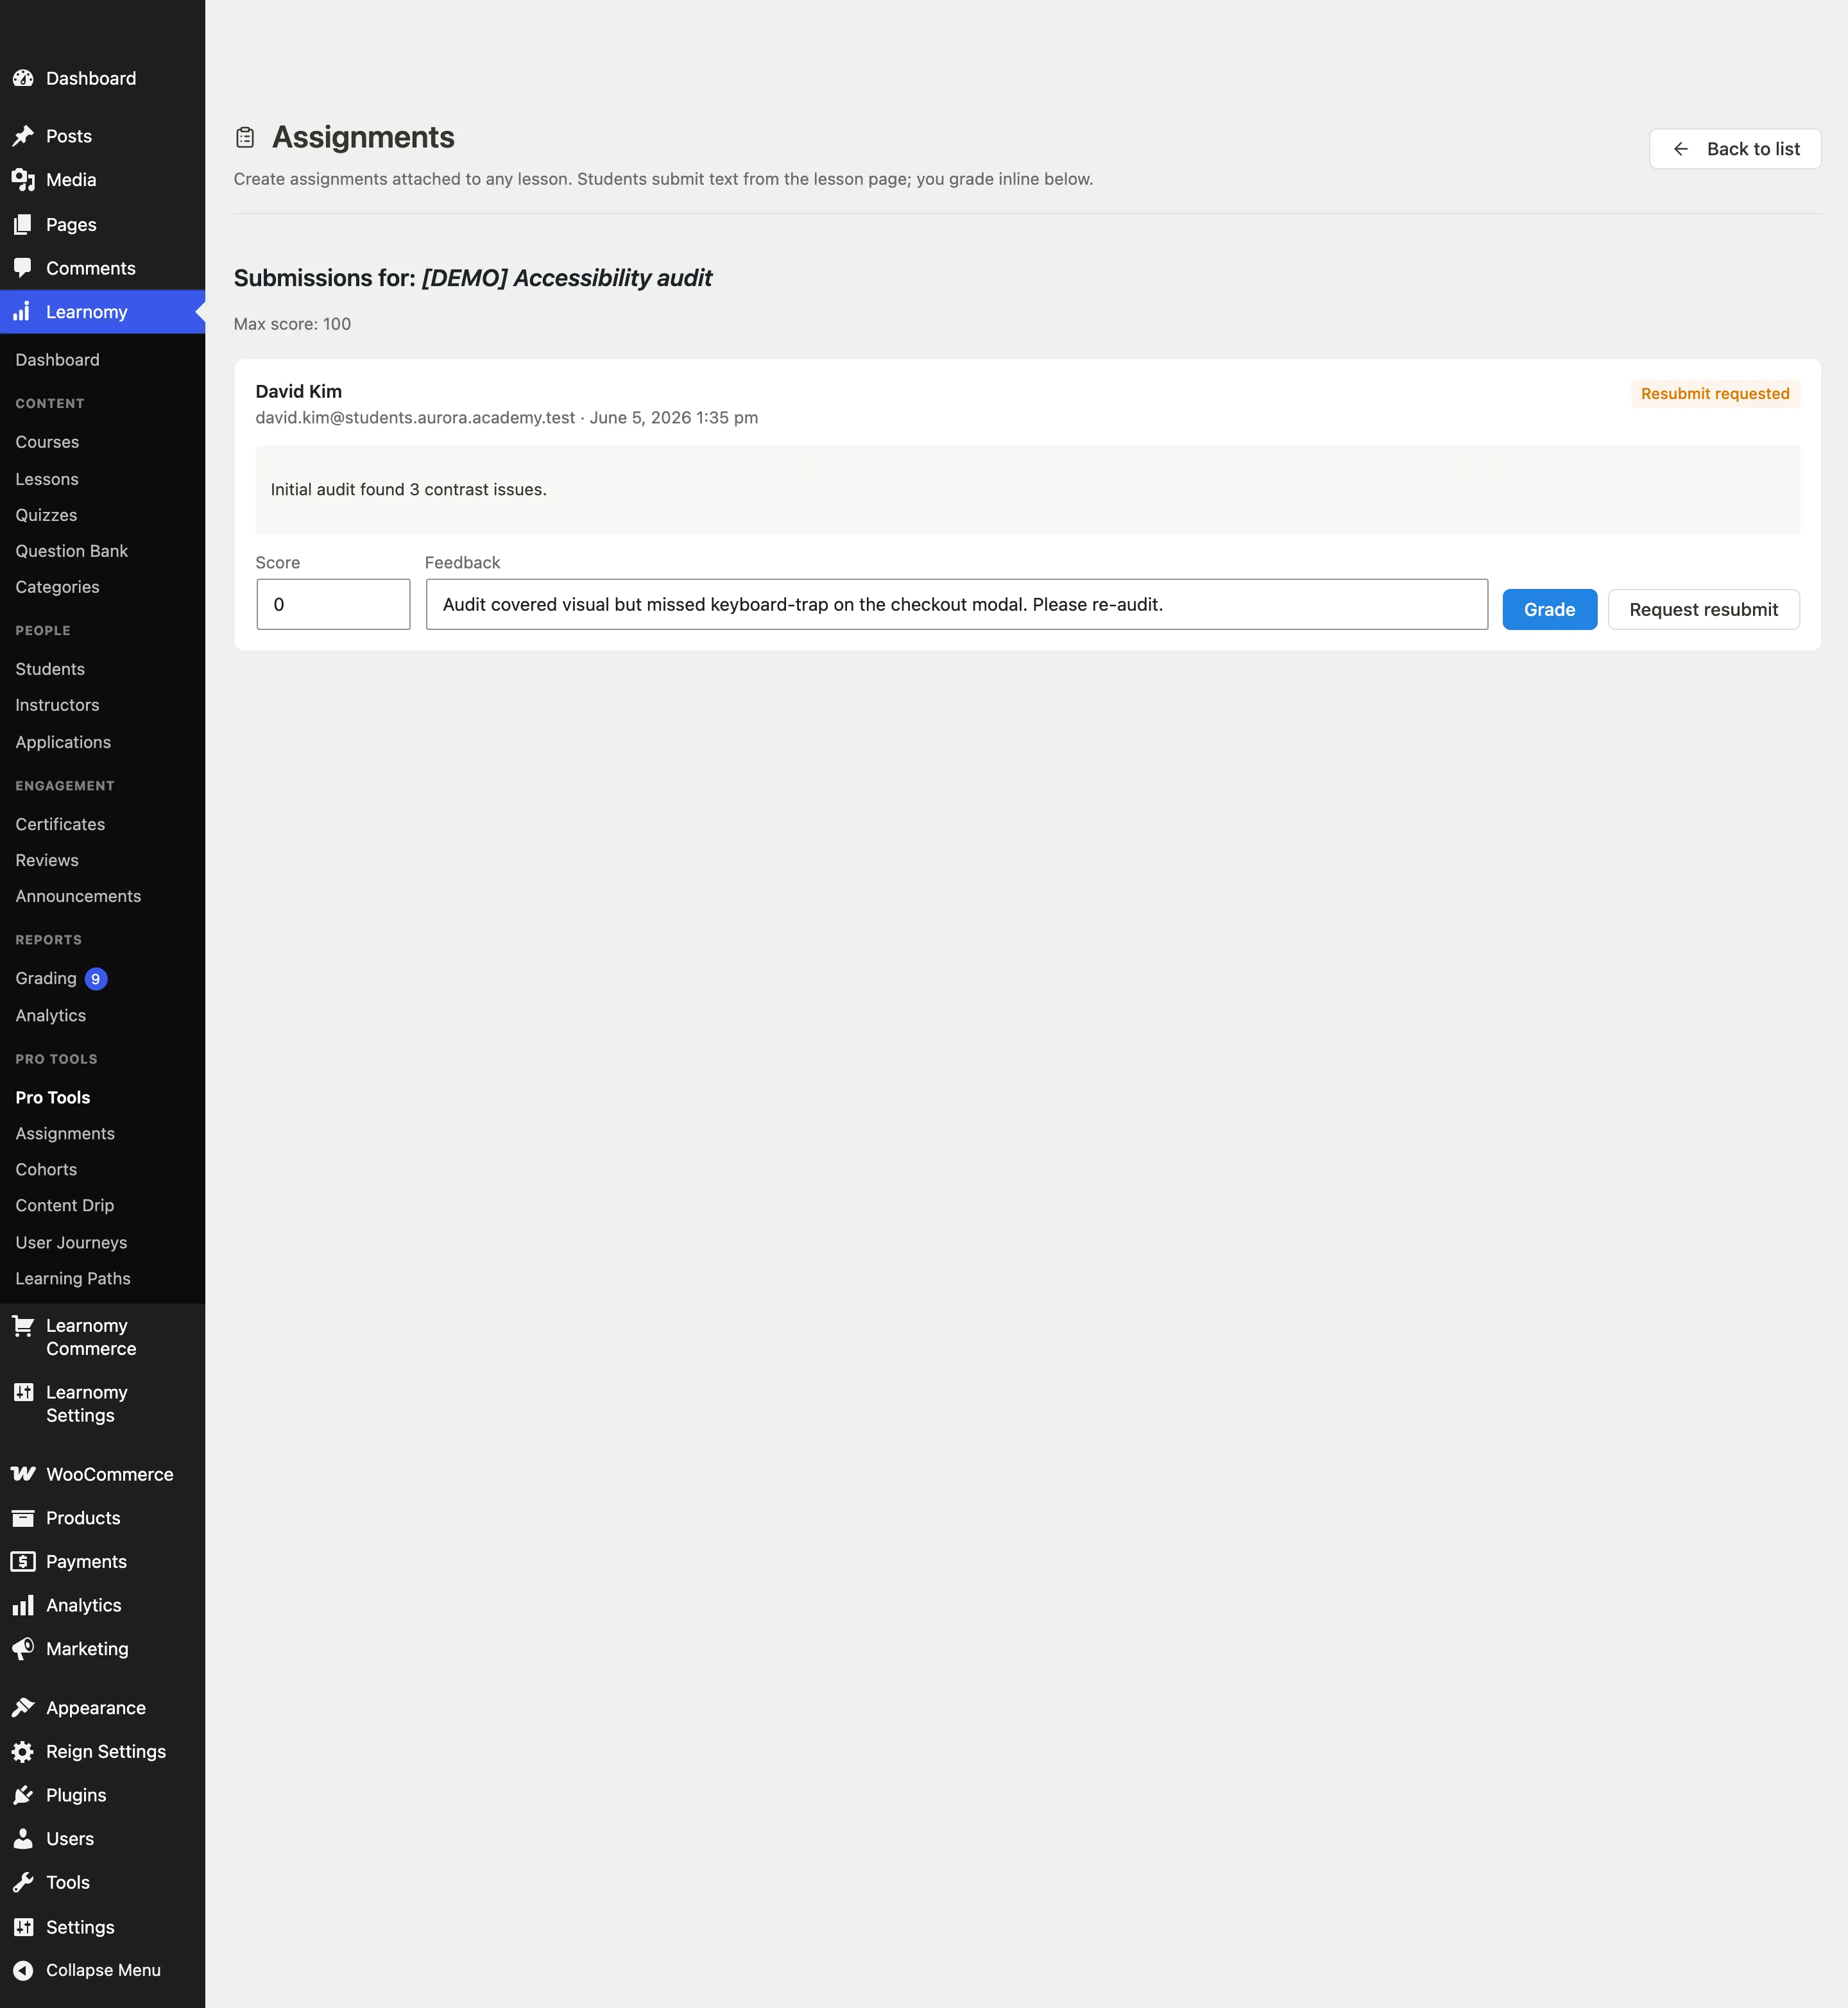
The grader shows every submission for this assignment with the student's name, their submitted text, any uploaded files, and any submission links - a link opens in a new tab so you can watch or read it full-screen instead of in a cramped inline frame.

For each submission, enter a numeric score in the score field (0 to the assignment's max score). Optionally add feedback text.
Click Grade to save. The submission is marked graded. The student sees the score and feedback the next time they open the lesson.
When all submissions are graded, the page shows "All caught up. No assignments to grade."
Click Back to list to return to the full assignments table.
Assignment reporting
When the Analytics extension is active, assignment activity joins the same reporting engine as revenue and enrollments:
- Instructor Reports include an Assignments section (paginated, 20 per page) with submissions, graded count, average score, and late count per assignment.
- REST:
GET /analytics/assignmentsandGET /analytics/assignments/{id}underlearnomy-pro/v1. - Shared CSV and PDF export cover assignment stats with the rest of the analytics export.
See Analytics Dashboard and Gradebook for how assignment scores feed the weighted course grade.
Who can grade
An assignment can be graded by the course author or any WordPress administrator. The grading REST endpoint checks this ownership rule.
Empty states
- If no assignments exist yet, the list shows "No assignments yet. Click 'Add new' to create one."
- If an assignment has no submissions, the grader shows "All caught up. No assignments to grade."
Tips
- Students can submit text, file attachments, a link, or any combination. Files are uploaded to the WordPress media library; links are stored as-is and are meant for content that already lives elsewhere (a hosted video, a cloud document).
- Grading uses a simple numeric score plus optional feedback. That is how assignment scoring works and stays.
- Looking for rubric-style grading with named criteria? That is available for essay quiz questions through the Advanced Quizzes extension, not on assignments.
- The due date is displayed in the assignment widget and enforced at the REST layer, evaluated in your site's timezone. Submissions after the deadline are rejected with an error - unless the instructor has explicitly requested a resubmission, which reopens the form regardless of the deadline.
- Reference files and reference links you attach to the assignment definition are visible to every enrolled student on the lesson, whether or not they have submitted yet - use them for the brief, starter files, or a rubric.
- The assignment widget on the lesson page is injected via the
learnomy_lesson_player_asidehook, so it appears in the lesson sidebar area regardless of which course template is active.