Outgoing Webhooks
Free & Pro
Outgoing webhooks let Learnomy POST a signed JSON payload to an external URL every time a chosen event occurs. Use them to connect Learnomy to Zapier, your CRM, a custom backend, or any HTTPS endpoint.
Overview
Webhooks are managed from Learnomy Settings > Outgoing Webhooks in the admin sidebar. Each webhook has a delivery URL, a set of subscribed events, a secret key for signature verification, and a status. The Free plan supports up to 3 webhooks. Learnomy Pro removes this limit.
Adding a Webhook
Go to Learnomy Settings > Outgoing Webhooks in the admin sidebar.
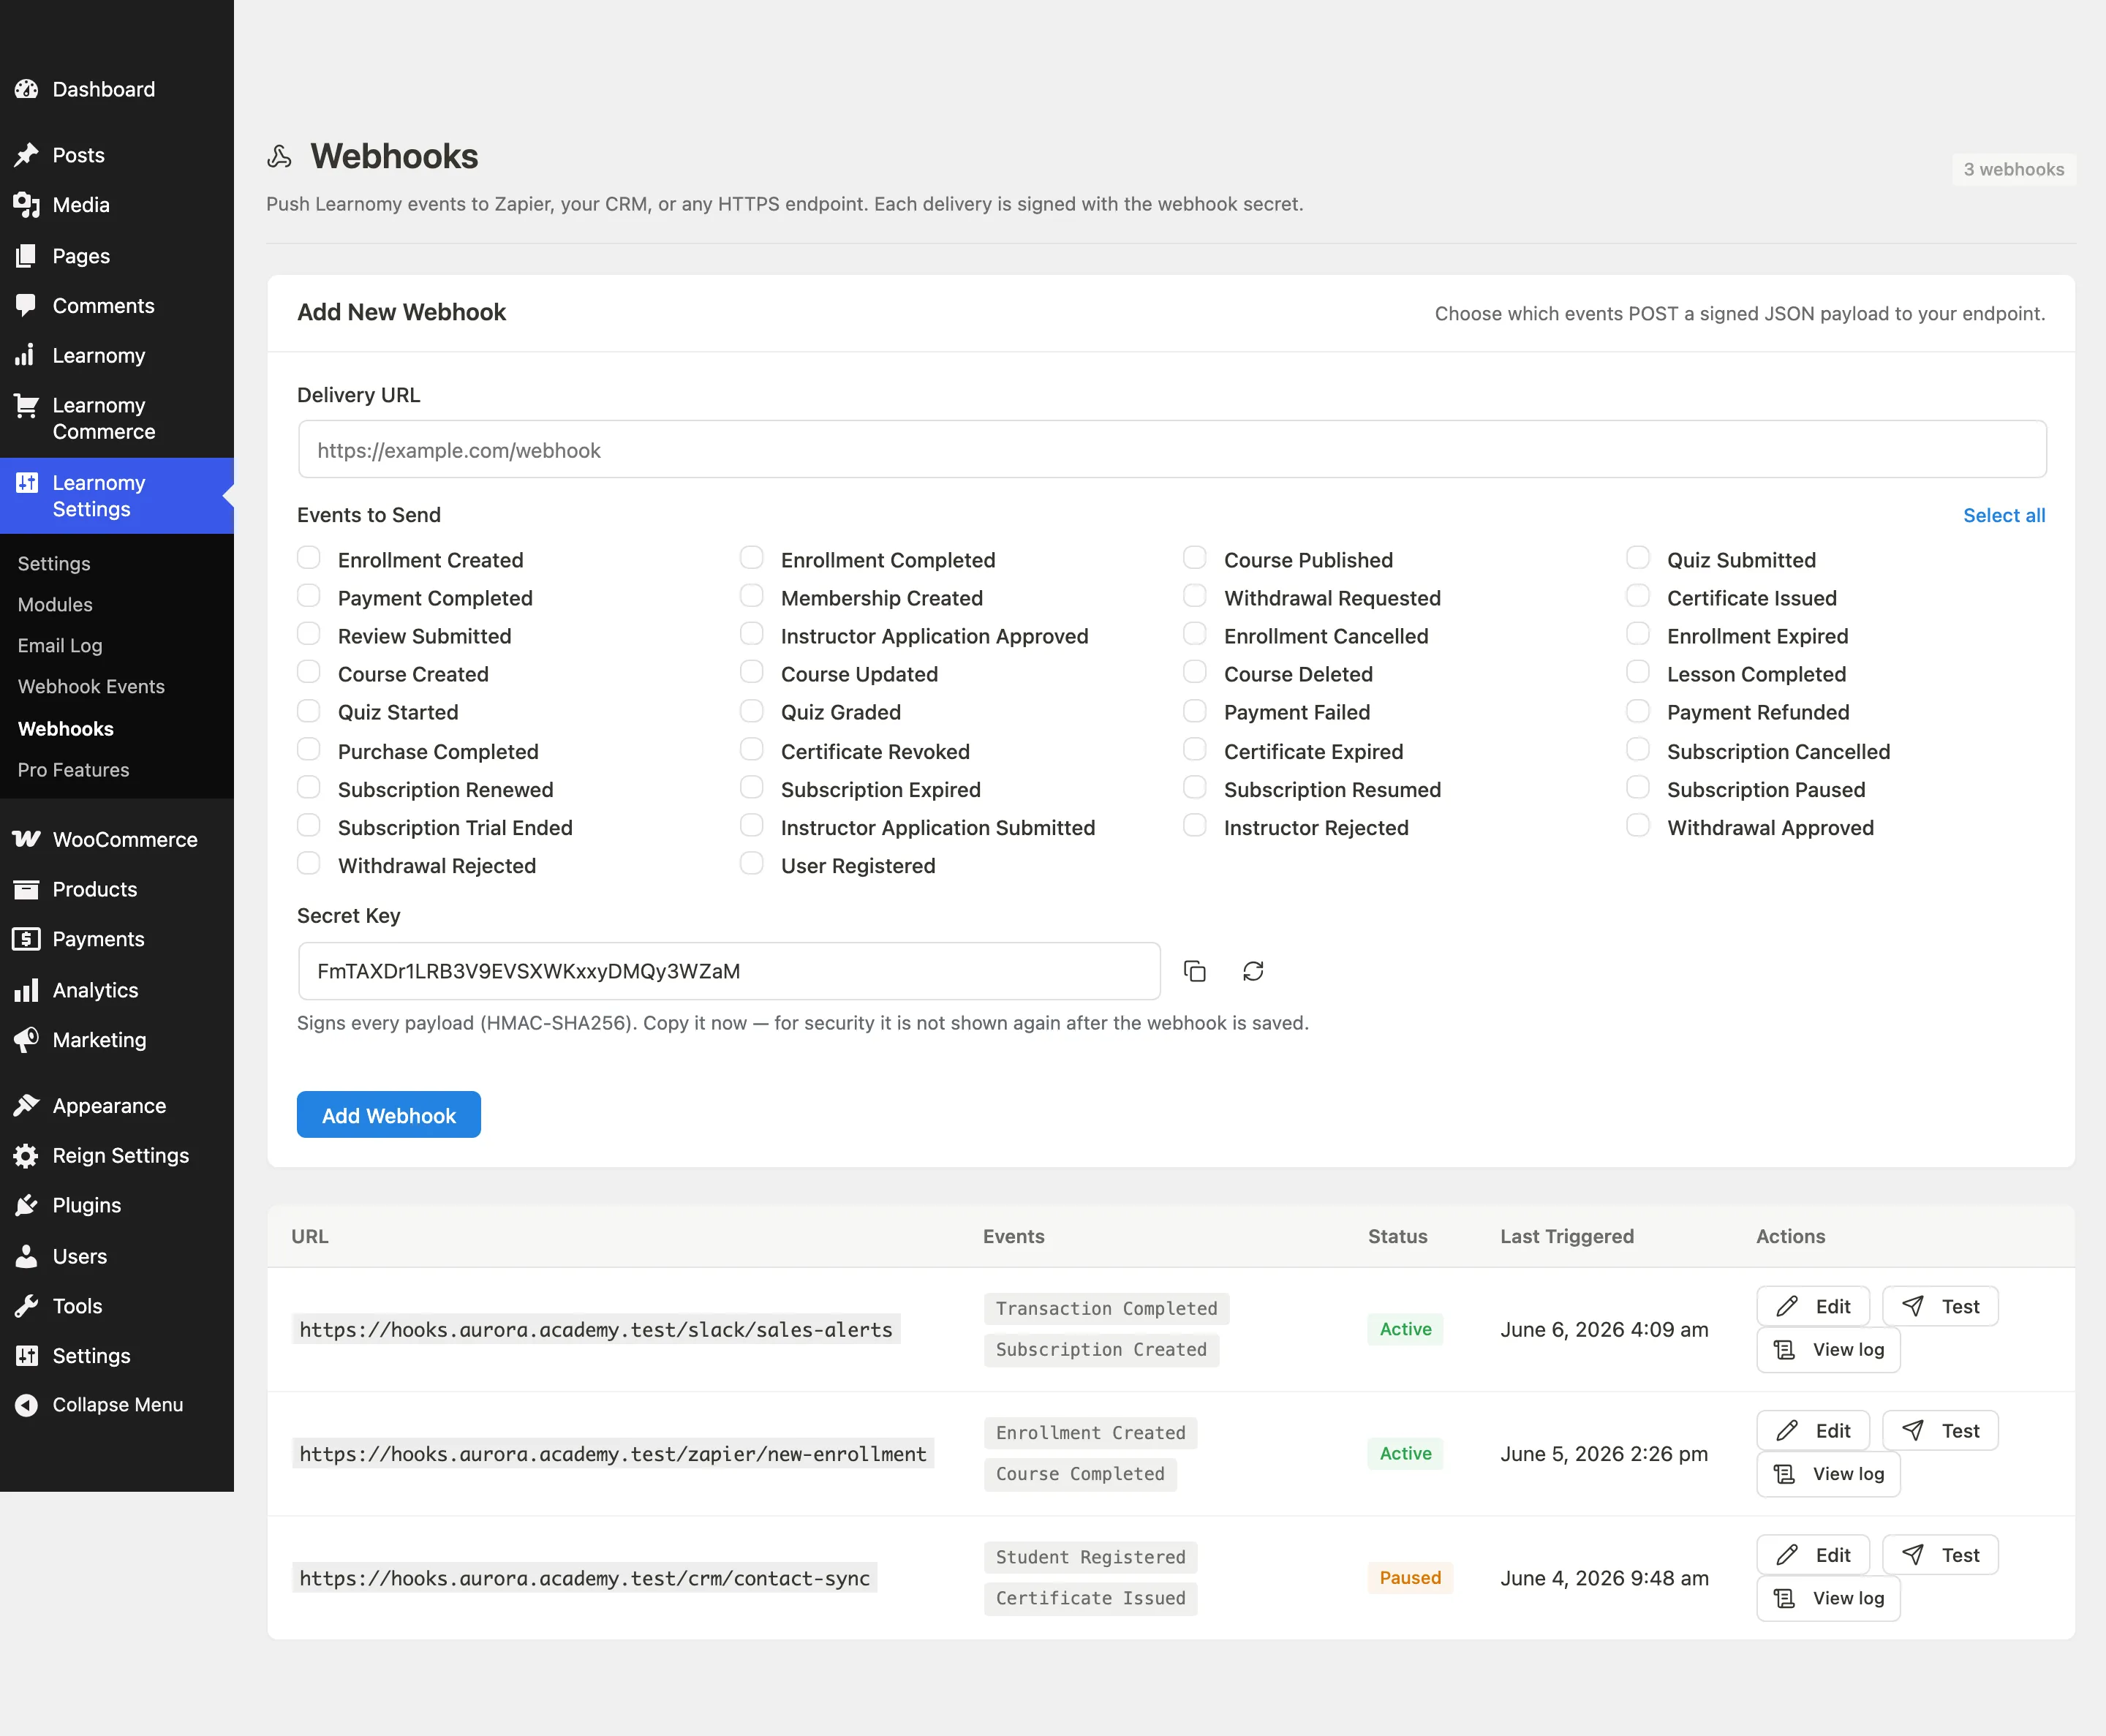
The page header shows how many of your webhook slots are in use.

Fill in the Add New Webhook form.
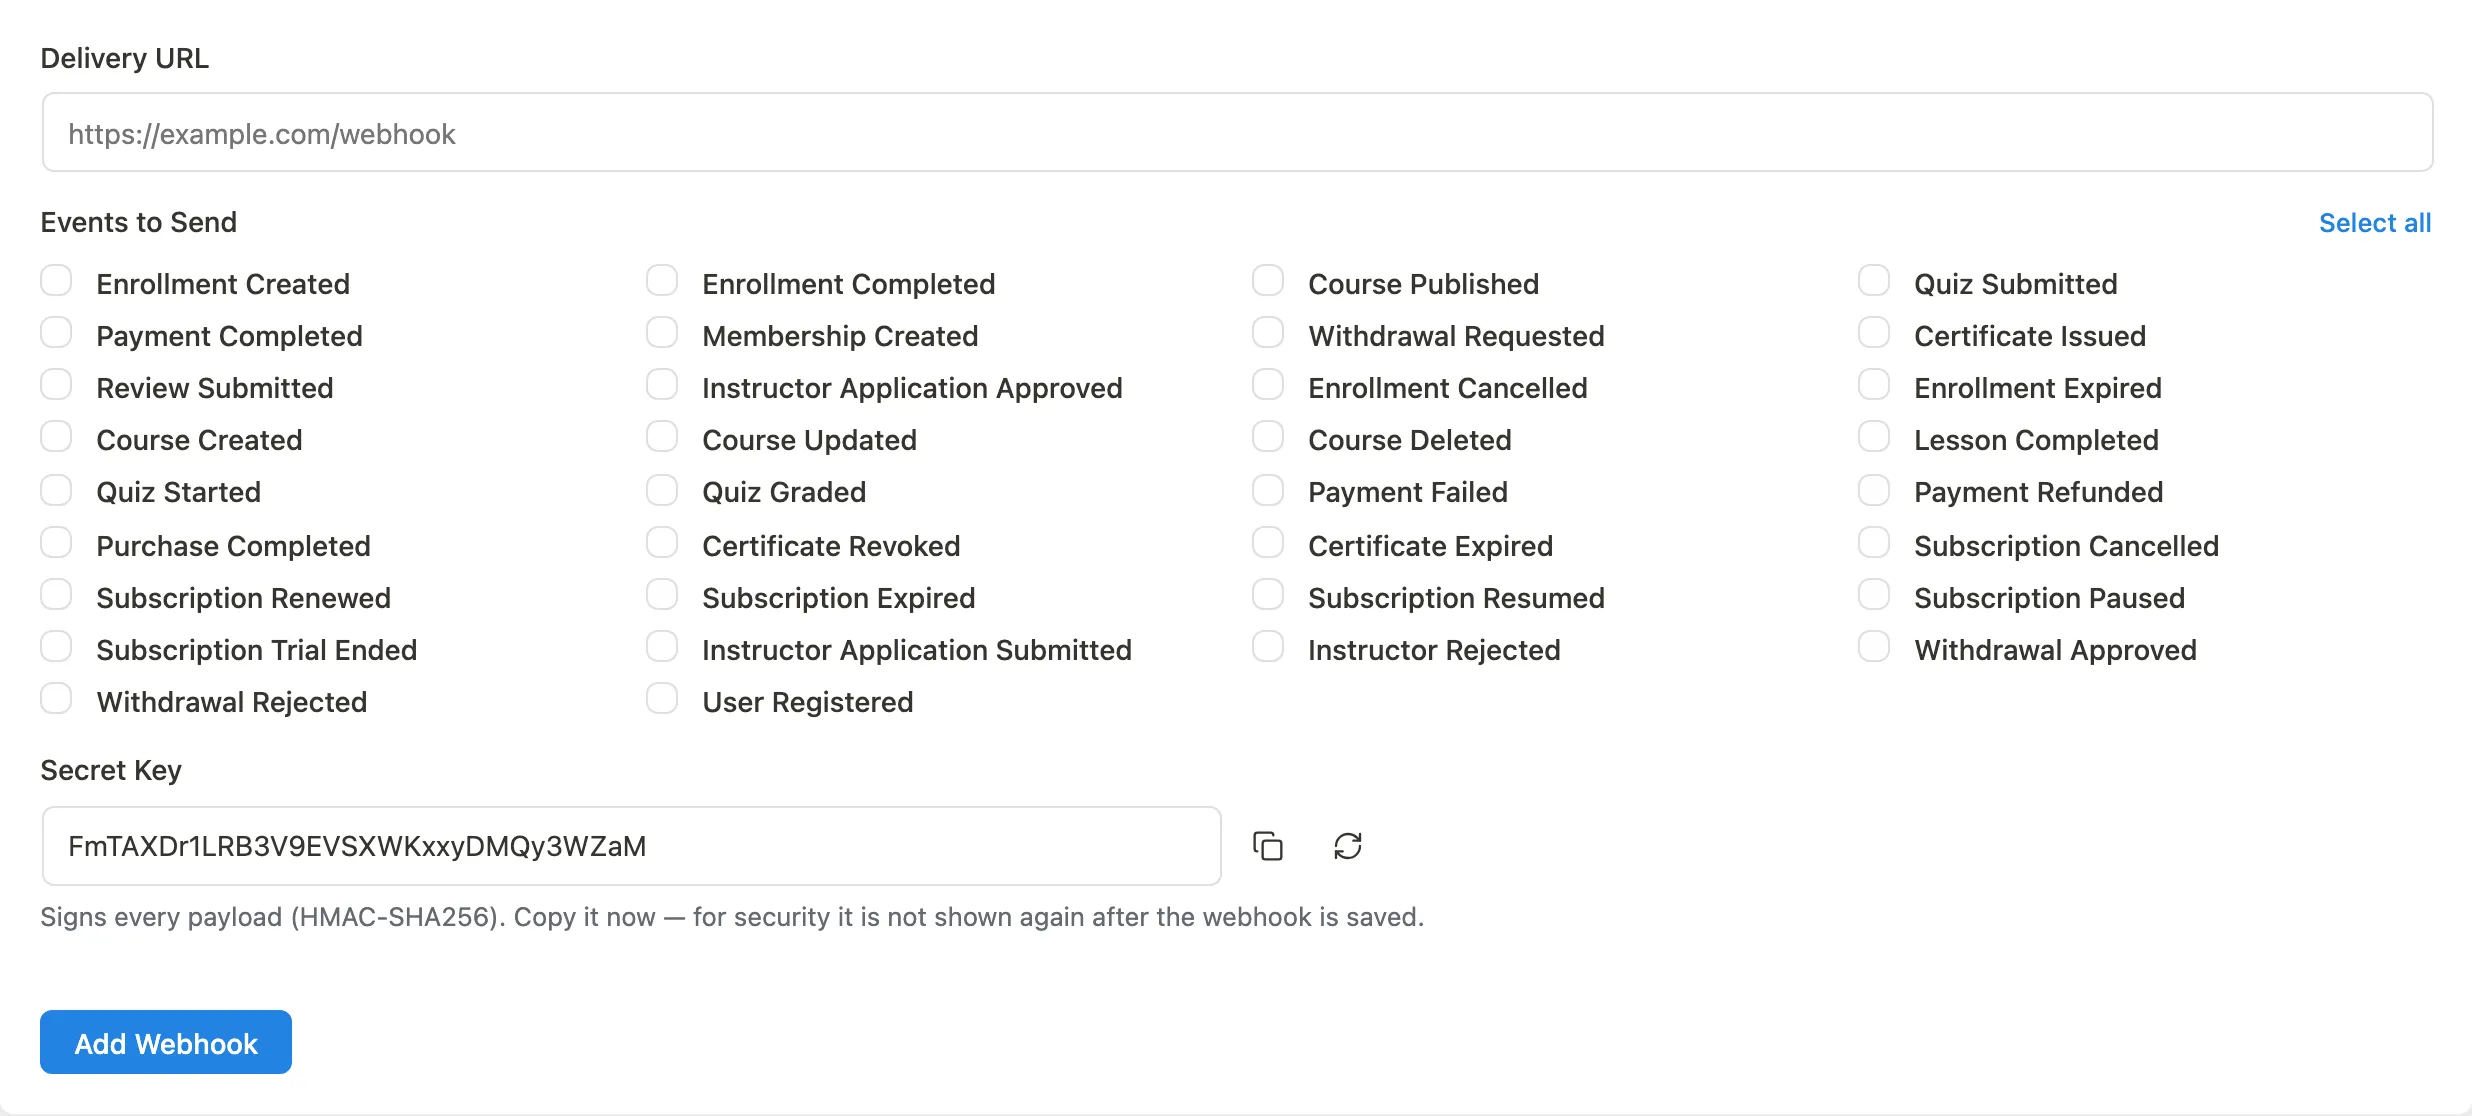
- Delivery URL: The HTTPS endpoint that will receive the POST. Must be a valid URL.
- Events to Send: Check every event type you want this webhook to fire on. Use Select all to check every option at once.
- Secret Key: A random 32-character key is pre-filled. Copy it now. For security, it is not shown again after you save. You can also click the regenerate button to get a new key, or copy the current value using the copy button.
Click Add Webhook.
The webhook appears in the table below the form immediately.
Available Events
Events come from Learnomy's canonical event catalogue. The checkboxes in the form list every event that can fire an outgoing webhook. Pro's Webhooks Pro extension adds additional lifecycle events via the learnomy_pro_webhooks_event_slugs filter.
Viewing and Editing Webhooks
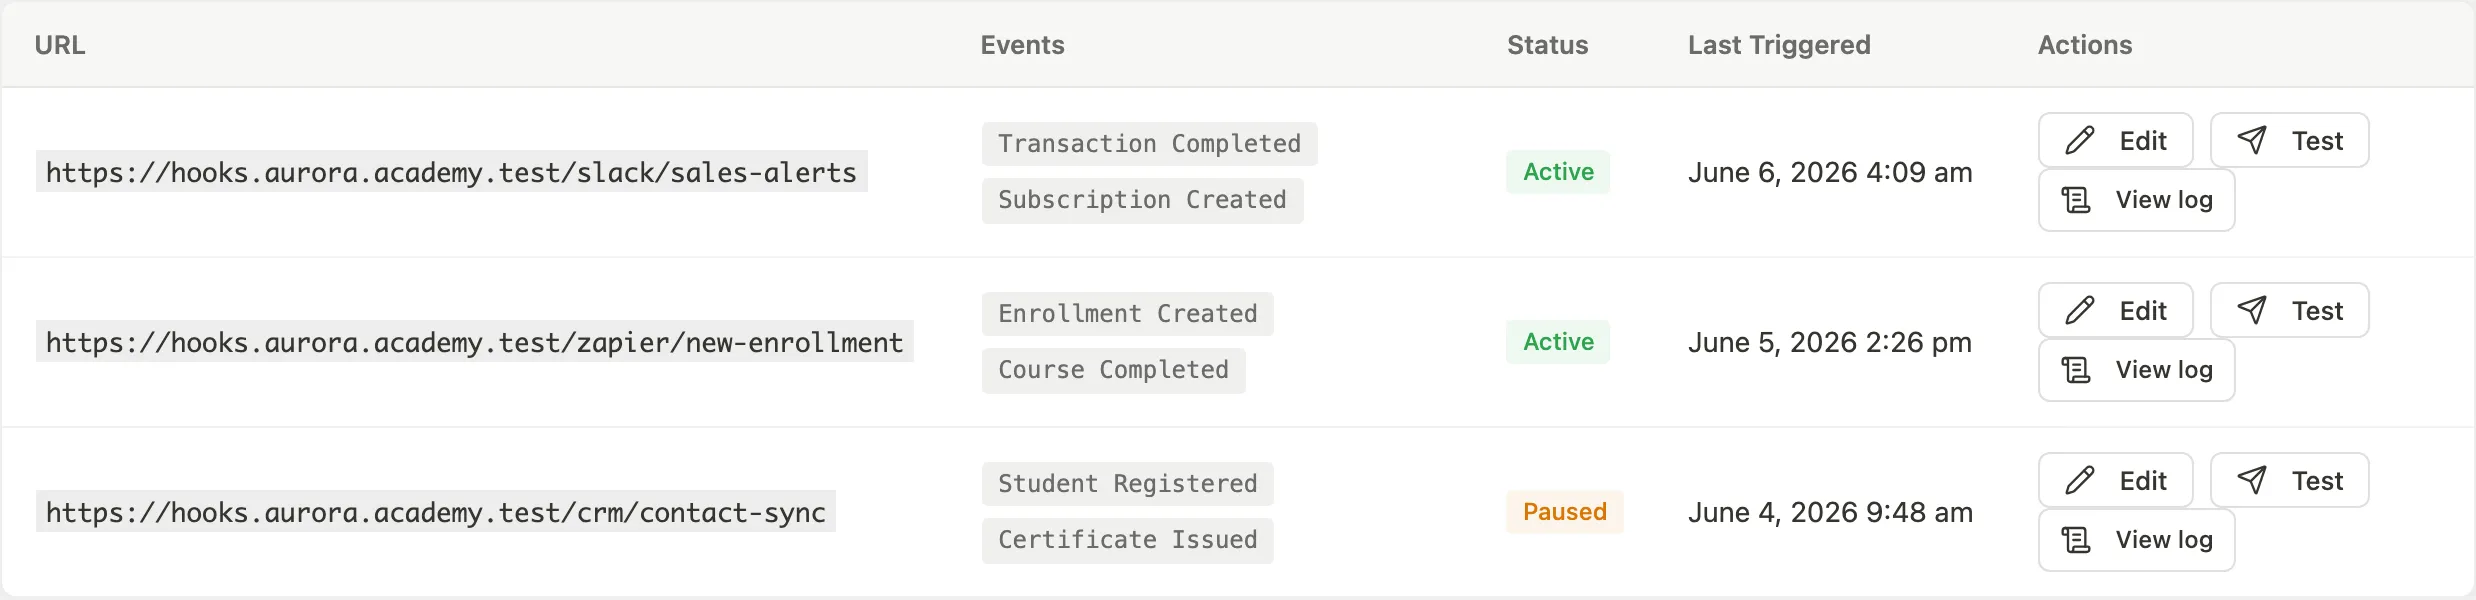
The webhooks table shows all configured webhooks.
| Column | What it shows |
|---|---|
| URL | The delivery endpoint (truncated to 60 characters; hover for the full URL) |
| Events | Badge-style list of subscribed event types |
| Status | Active, Paused, Disabled, or Failed |
| Last Triggered | Date and time of the most recent delivery attempt, or "Never" |
| Actions | Edit, Test, and Delete buttons |
Edit: Opens the Add Webhook form pre-filled with the webhook's current URL and events. You can update the URL and events, then save. Note: editing does not change the secret key; the stored secret is preserved.
Test: Sends a test payload to the endpoint immediately. Use this to confirm your endpoint is reachable and that the signature verification in your receiver is working before waiting for a real event.
Delete: Permanently removes the webhook and stops all future deliveries to that URL. A confirmation prompt appears before the delete completes.
The Free 3-Endpoint Limit
Free installations can configure up to 3 outgoing webhooks. When you have reached the limit, the Add New Webhook form is replaced by a notice pointing to Learnomy Pro.
🔶 Pro feature. Available in Learnomy Pro. Learnomy Pro removes the 3-webhook cap so you can configure as many outgoing webhooks as needed. See the "What's in Pro" page under Learnomy Settings.
Verifying Signatures
Every outgoing payload is signed with HMAC-SHA256 using the secret key you set when creating the webhook. Learnomy adds an X-Learnomy-Signature header to each request. In your receiver, compute HMAC-SHA256(secret, raw_body) and compare it to the header value to confirm the payload came from your site.
Tips
- A webhook with Failed status has encountered repeated delivery errors. Check your endpoint for downtime or errors, then use the Test button to confirm it is reachable again.
- Once saved, the secret key is not shown again or retrievable through the admin UI. If you lose it, delete the webhook and create a new one.
- Learnomy validates delivery URLs against a server-side allowlist to prevent SSRF attacks. Private IP addresses, localhost, and reserved ranges are rejected.
- Pro's Webhook Delivery Log gives a per-webhook history of every outbound delivery, response code, and retry. See Webhook Delivery Log.