Creating a Course
This page walks through creating a course from scratch, configuring its settings, and building its curriculum using the Course Builder.
Overview
Courses live under Learnomy → Courses. You create one course form, then open the Course Builder to arrange your lessons and quizzes, with or without sections. The course form handles metadata, pricing, and settings; the builder handles curriculum structure.
The courses list
Go to Learnomy → Courses to see all courses.
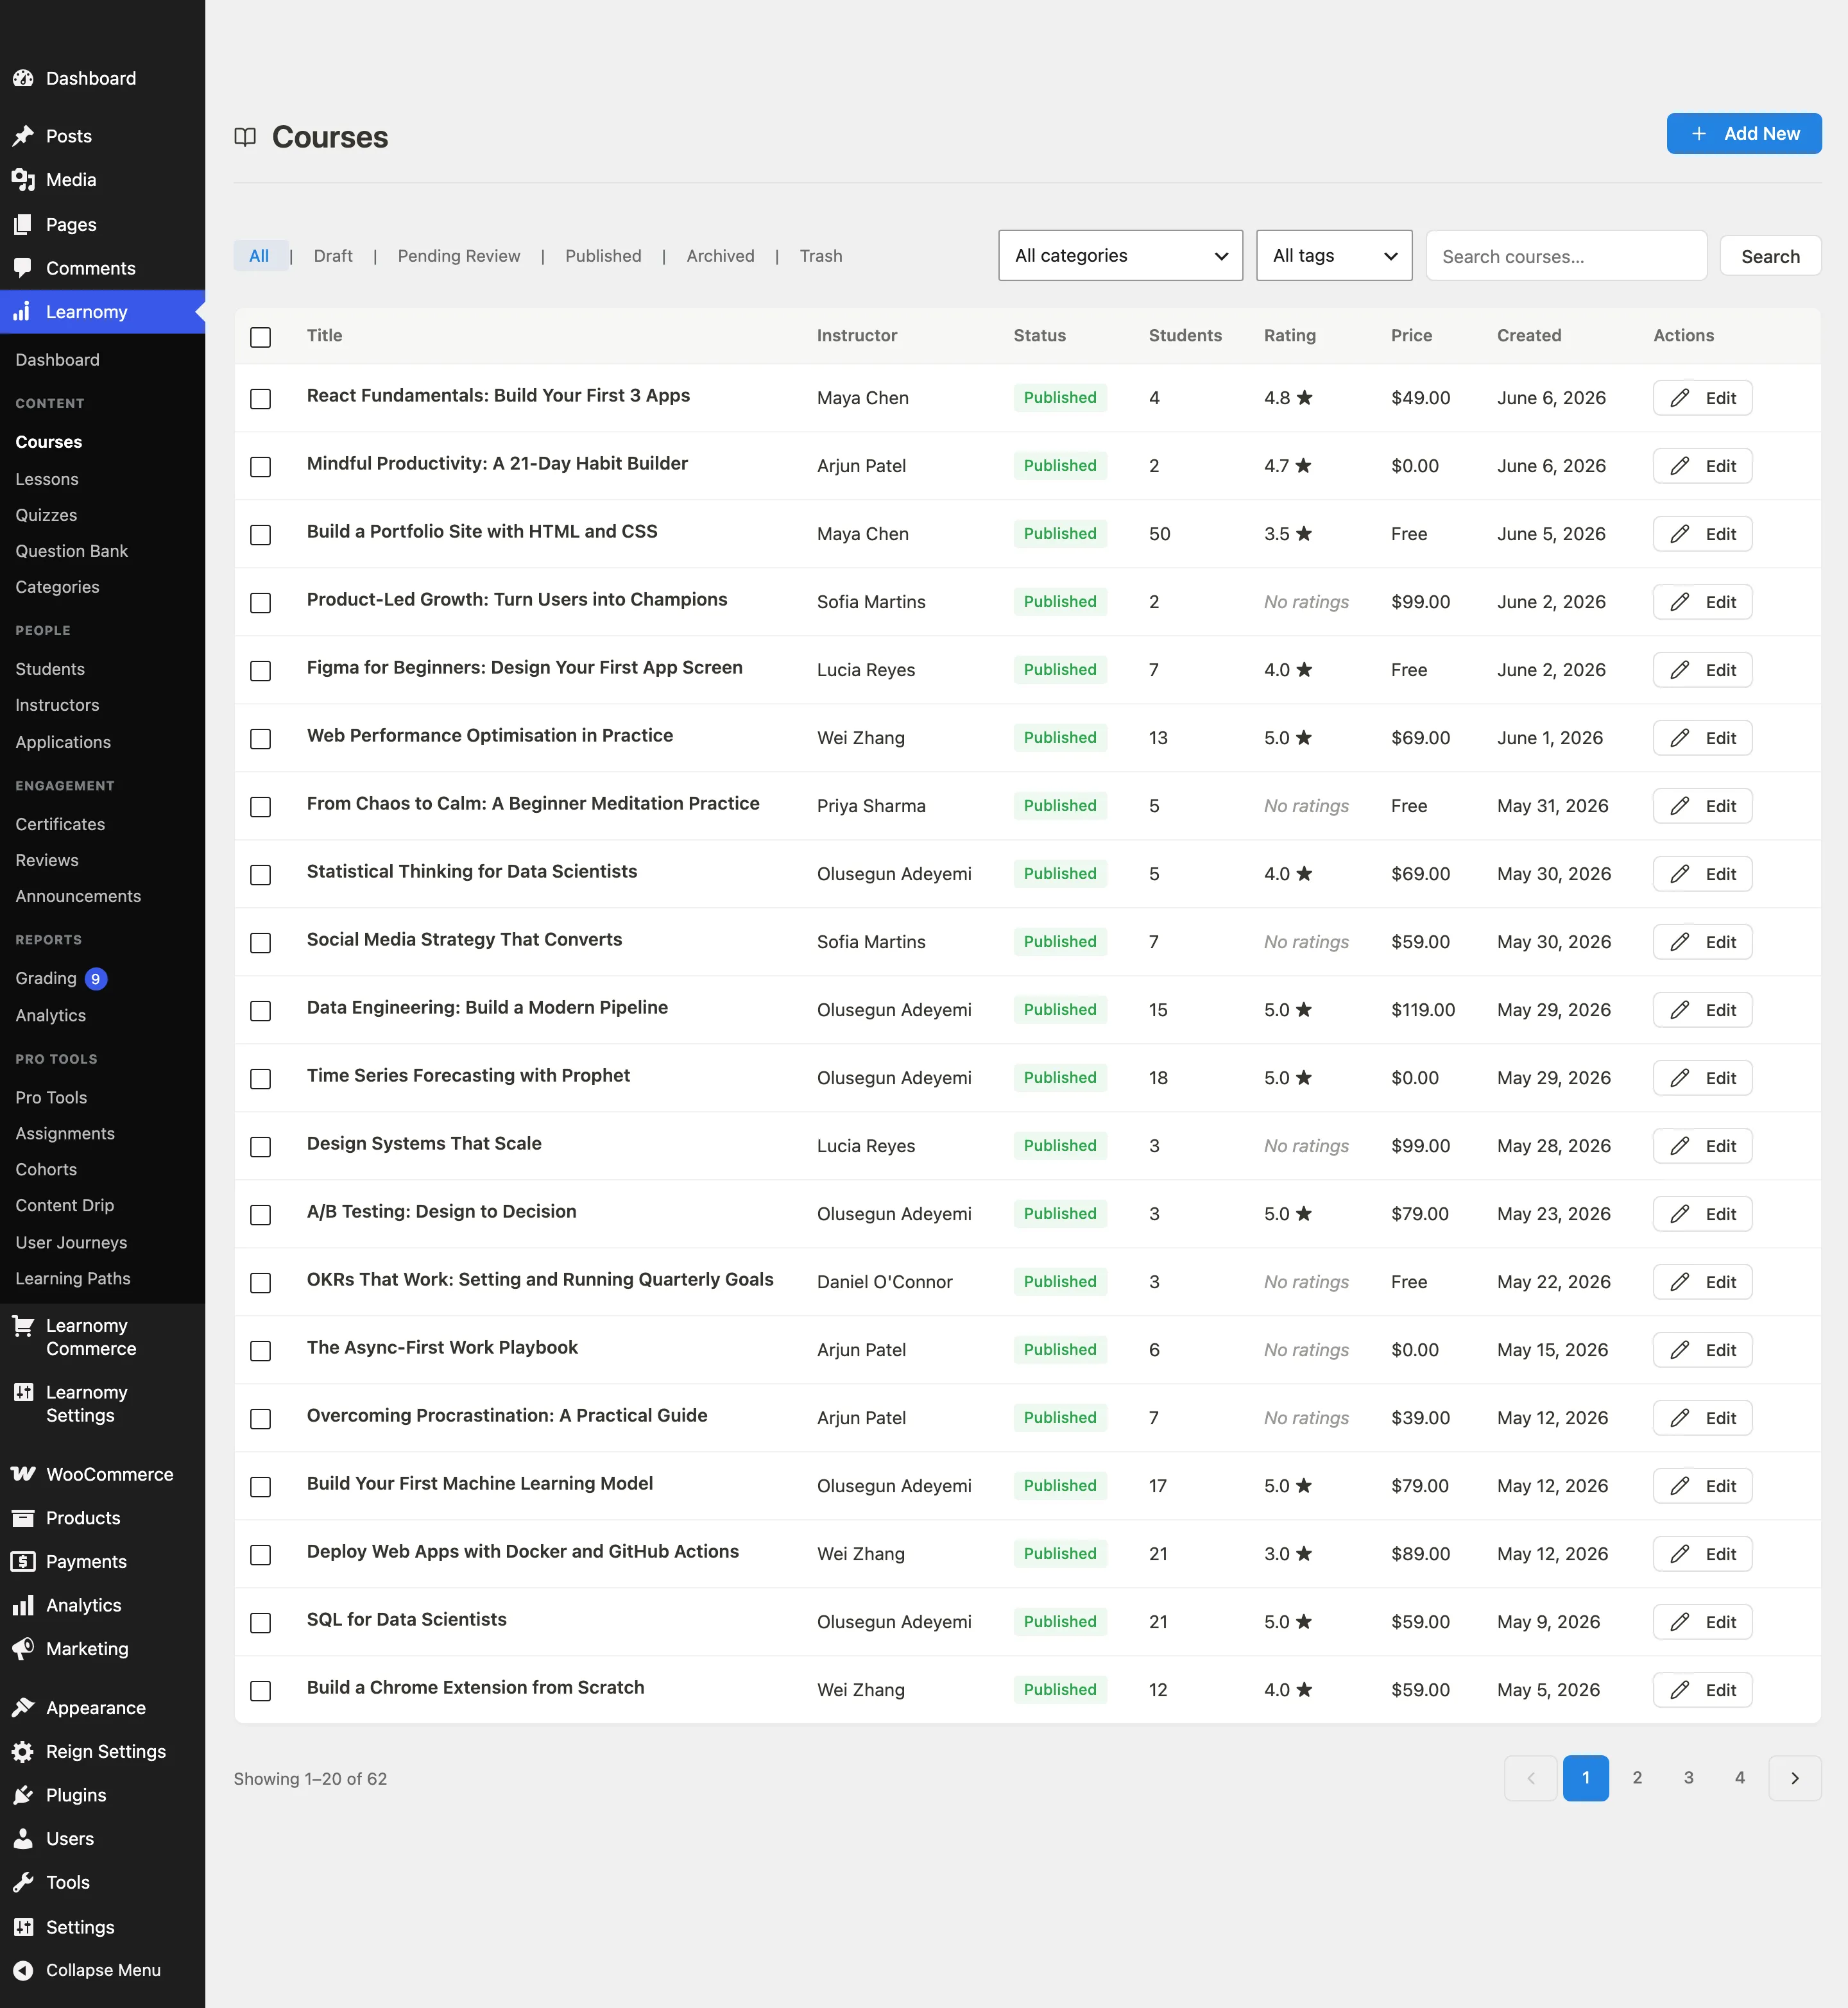
The list header shows filters for status and category, plus a search input.

The filter bar lets you narrow by status (All, Published, Draft, Pending, Trashed) and by category.

The table shows each course's title, category, status, price, student count, and rating.
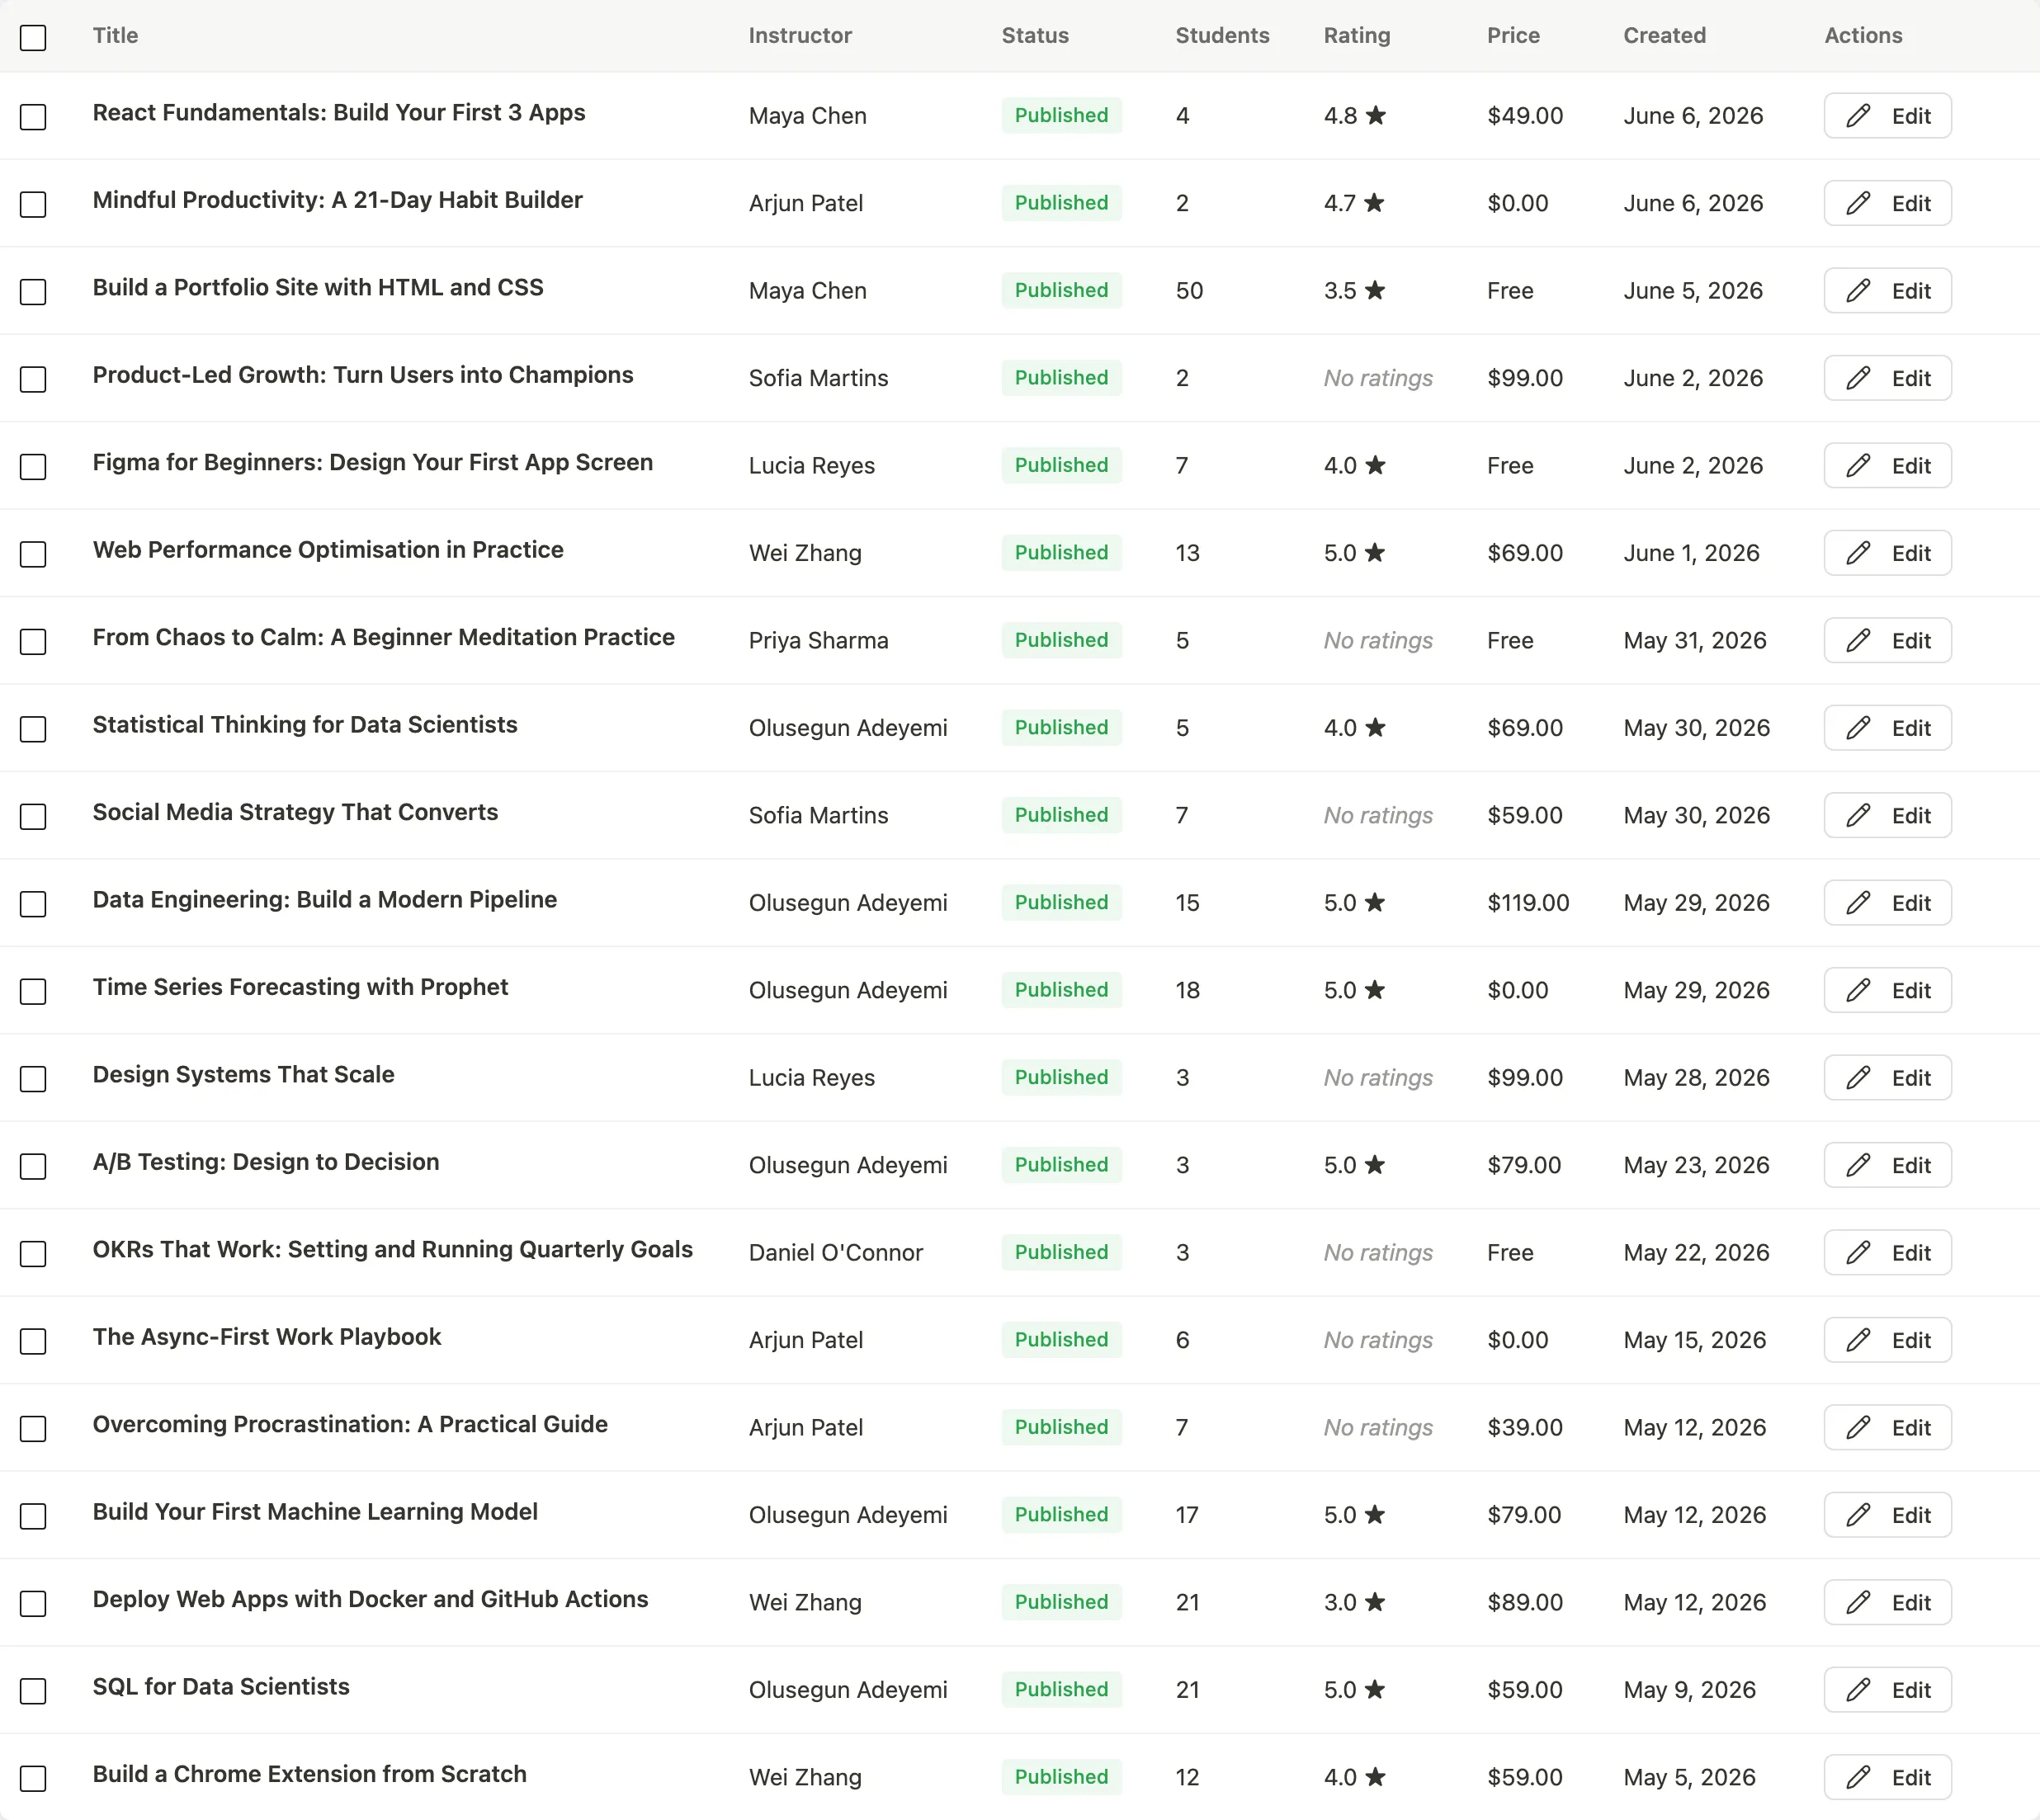
Row actions: Edit opens the course form. View opens the public course page. Duplicate makes a copy of the course, including its full curriculum (sections and lessons); the copy is created as a draft so you can rename and change it before publishing. Publish or Draft flips the status. Trash moves the course to trash. Trashed courses show Restore and Delete Permanently instead.
Creating a new course
Go to Learnomy → Courses and click Add New Course in the page header.
Fill in the required fields:
- Title -- the course name shown on the catalog card and the course page.
- Slug -- the URL-friendly identifier. Auto-generated from the title; you can change it.
- Category -- assign the course to one category.
- Thumbnail -- the image shown on the card and in the hero. Recommended size: 1280 x 720 px.
Add a Short Description (one or two sentences shown on the catalog card) and a longer Description (shown in the About section of the course page). Both use the WordPress block editor.
Configure the settings sections described below.
Click Save to create the draft. Click Publish when it is ready for students.
Course settings
The course form is divided into settings sections. Click any section header to expand or collapse it.
Pricing and Access
This section controls how students get access to the course.
Choose a Pricing model from the radio group:
| Model | Description |
|---|---|
| Free | Anyone signed in can enroll. No payment required. |
| One-time payment (lifetime access) | Student pays once and keeps access permanently. |
| One-time payment (time-limited access) | Student pays once and keeps access for the number of days you set. A renew option appears when access expires. |
| Recurring subscription | Student pays every month or year. Requires Stripe to be connected -- Stripe creates the price automatically. |
| Members only | Student needs an active membership plan that includes this course. Only visible when the Membership module is enabled. |
| One-time payment OR Members | Student can either buy outright or enroll through an active membership. Only visible when both Payments and Membership are enabled. |
When you choose a paid model, fields for Regular price and Sale price appear. You can also set a Sale starts and Sale ends date range; outside that range the regular price applies.
For time-limited access, set the Access duration (days).
For recurring subscription, set the Recurring amount and Billing interval (Monthly or Yearly).
Private (hide from catalog) hides the course from the public catalog. Only enrolled students and admins can see it.
Pricing model lock: once at least one student has paid for a course, the pricing model is locked to protect existing customers. To relaunch the course with different pricing, copy it with the Duplicate row action on the courses list and price the copy.
Gateway warnings: if you select a paid model but no real payment gateway is configured, the form shows a warning banner with a link to Learnomy Settings → Payments.
Completion and Certificate
Define what counts as completing this course.
Completion Requirement options:
| Option | Description |
|---|---|
| All Lessons Completed | Student must mark every lesson complete. |
| Lessons + Final Quiz | Student must complete all lessons AND pass the final quiz. |
| Percentage of Content | Student must complete at least the set percentage of lessons (slider, 1-100%). |
| Manual Completion | Admin or instructor marks the course complete manually. |
Per-Lesson Rule Enforcement controls how strictly individual lesson completion rules (minimum watch time, video percentage, scroll-to-end, quiz pass) are applied in this course. Options: Inherit from site setting, Strict (rules must be met before Mark Complete activates), Advisory (rules shown but optional), Off (no rules). Individual lessons can still override this per lesson.
Award a certificate on completion -- tick to enable. When ticked, a Certificate Template picker appears. If no templates exist yet, a shortcut link takes you to the certificate designer. See the Certificates documentation for how to build templates.
Completion Message -- text displayed on the completion screen. Supports basic formatting.
Allow students to retake the course -- tick to let students restart the course after completing it. Optionally tick Reset progress when they retake to clear all lesson and quiz progress on retake.
Progression and Flow
Controls how students move through content.
Require lessons to be completed in order -- when ticked, students must finish each lesson before the next one unlocks. The lesson player shows a lock icon on future lessons.
Minimum Time per Lesson -- sets a site-wide floor in minutes. The Mark Complete button stays disabled until this time elapses. Set to 0 to disable. Individual lessons can set their own minimum time in their lesson settings, which overrides this course-level value.
Engagement
Configure the community features available inside this course.
| Setting | Default | Description |
|---|---|---|
| Enable comments on lessons | On | Allows students to comment on individual lessons. |
| Enable course reviews | On | Students can leave a star rating and review after enrolling. Both this flag and the global Reviews setting must be on for reviews to show. |
| Course announcements | On | Instructors can send announcements to enrolled students. |
| Welcome message | -- | A message shown to the student immediately after enrollment. |
Visibility
Featured -- marks the course as featured. Featured courses surface at the top of the catalog when sorting by Featured.
Private -- also available here (mirrors the Pricing section toggle).
Building the curriculum
After saving the course, click Build Curriculum from the course form header.
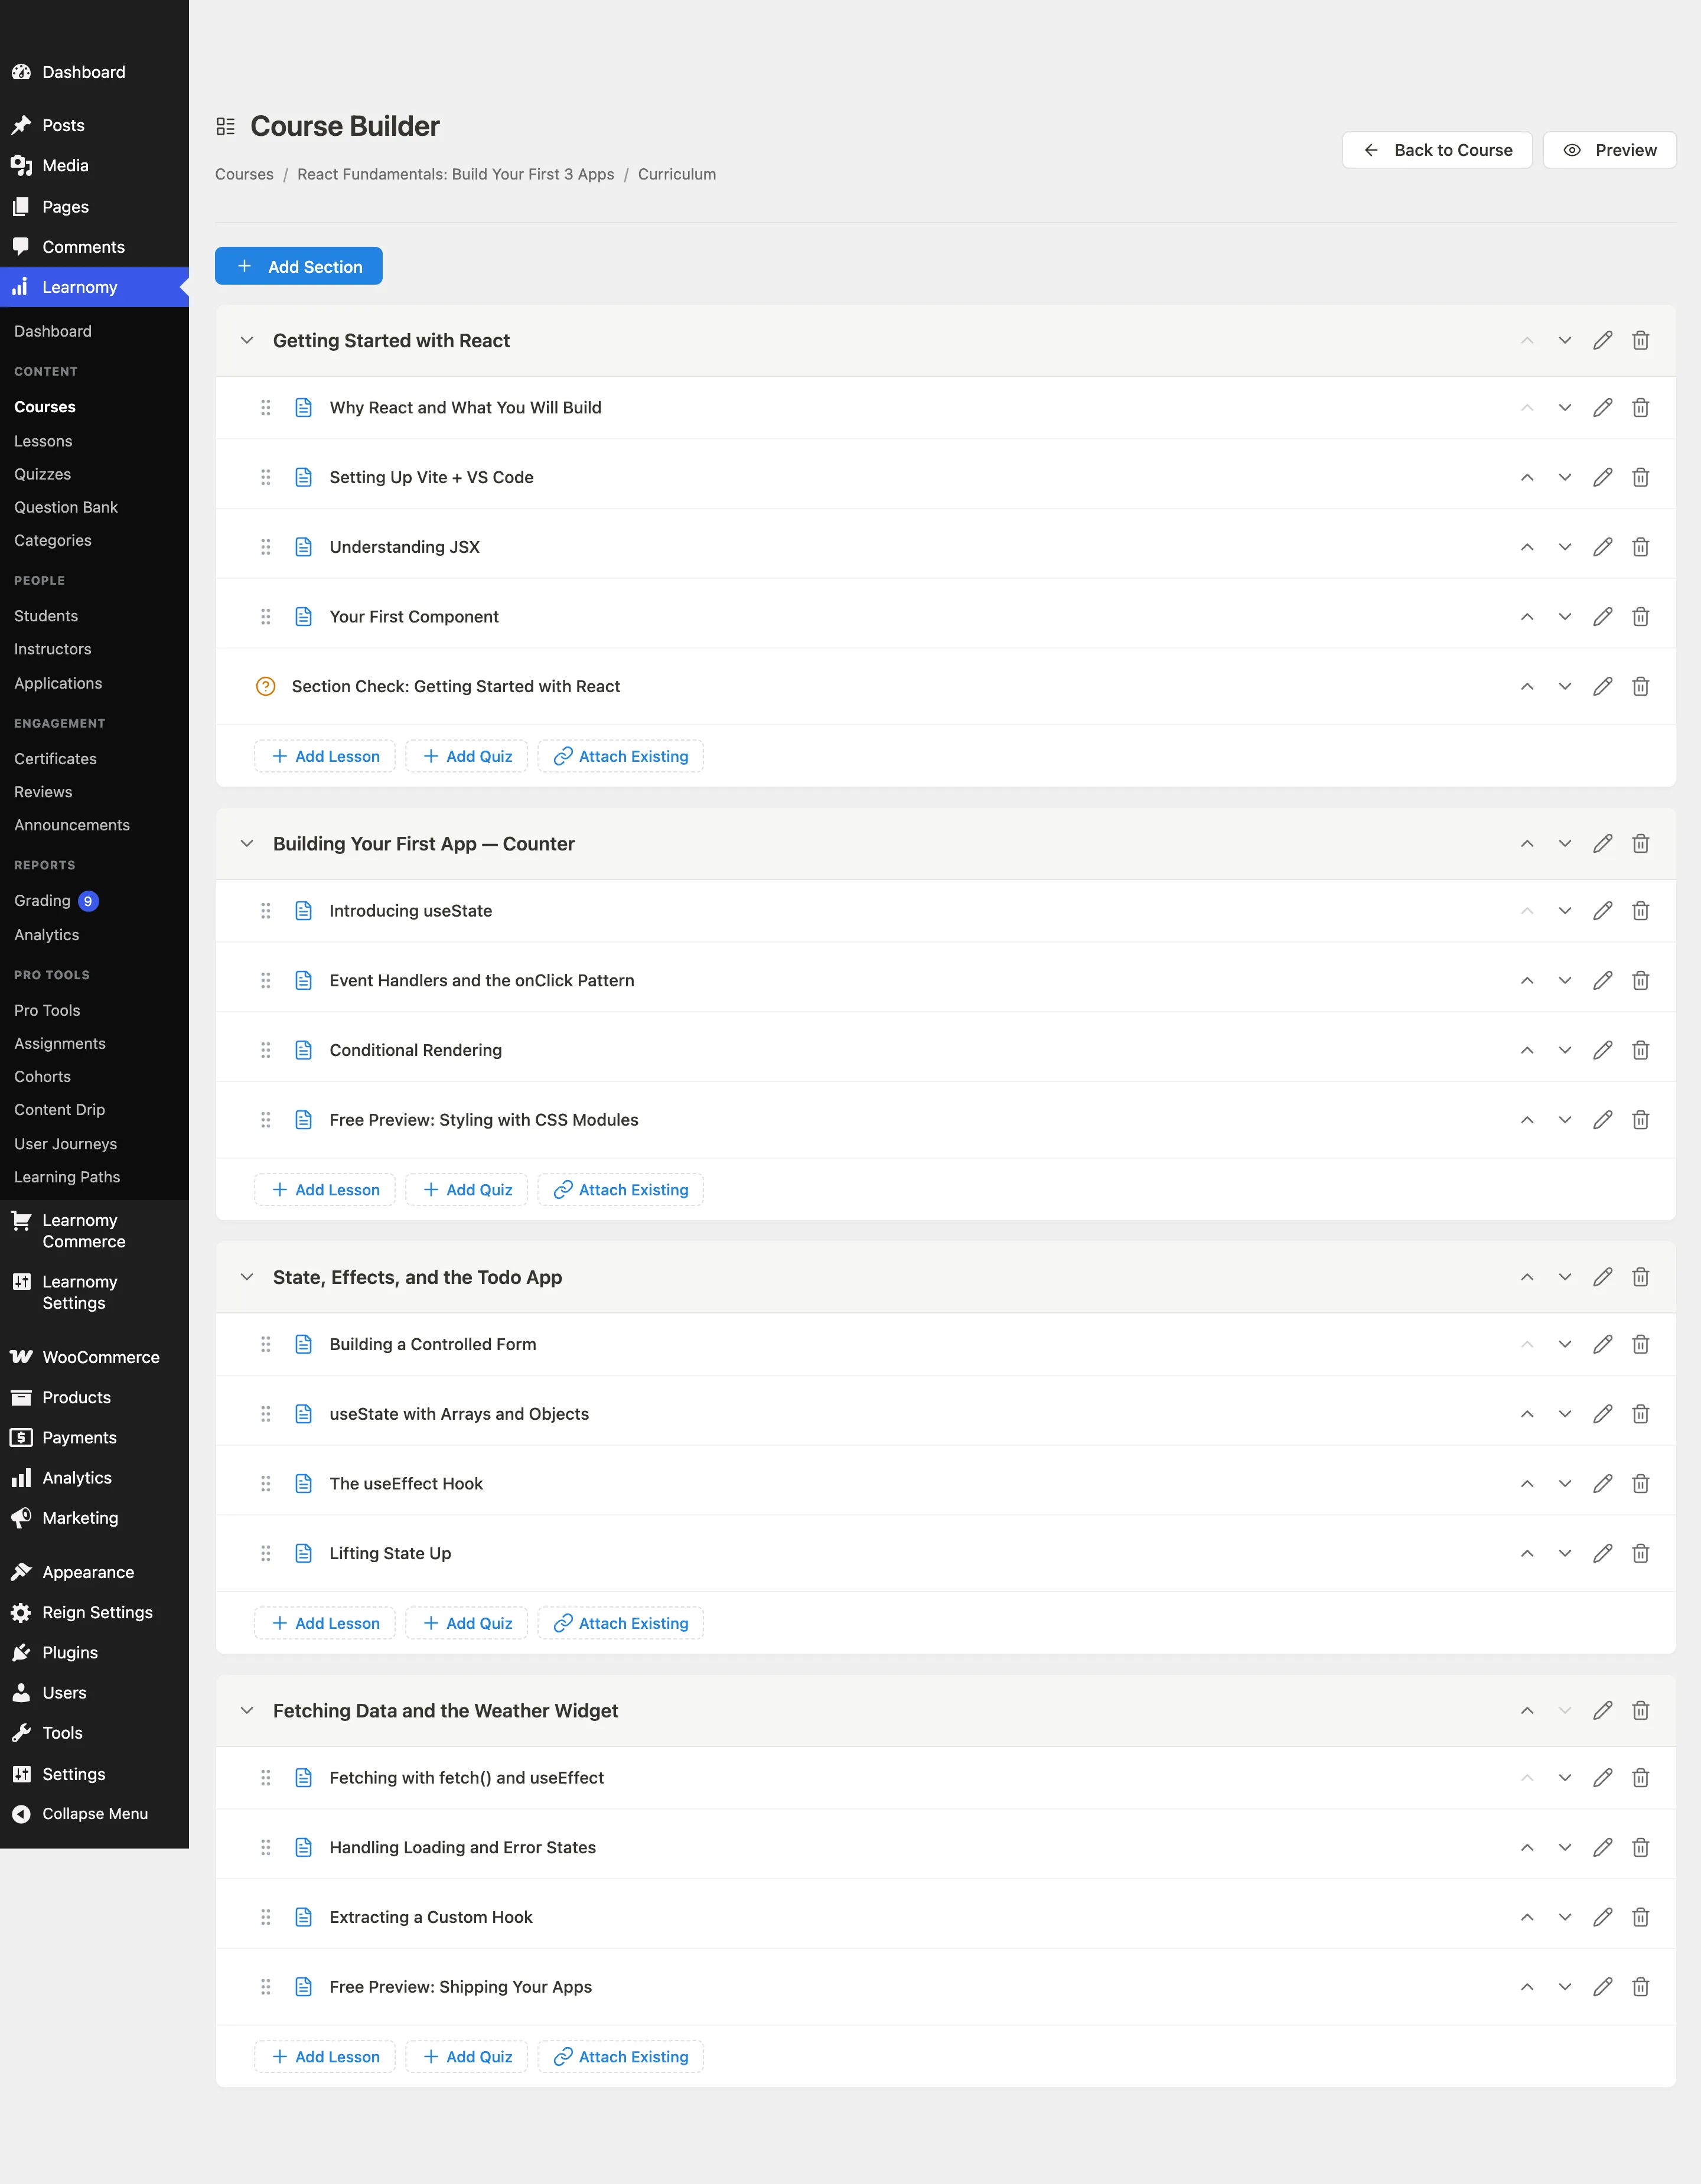
Builder header
The header shows the course name, a breadcrumb back to the course form, and a Preview link that opens the public course page in a new tab.

Adding sections (optional)
Sections are optional. They group lessons and quizzes into chapters, which is useful for longer courses. A short course can hold lessons and quizzes directly with no sections at all.
Click Add Section to create a section (chapter).
Give each section a title. Drag sections to reorder them.
Lessons and quizzes without a section
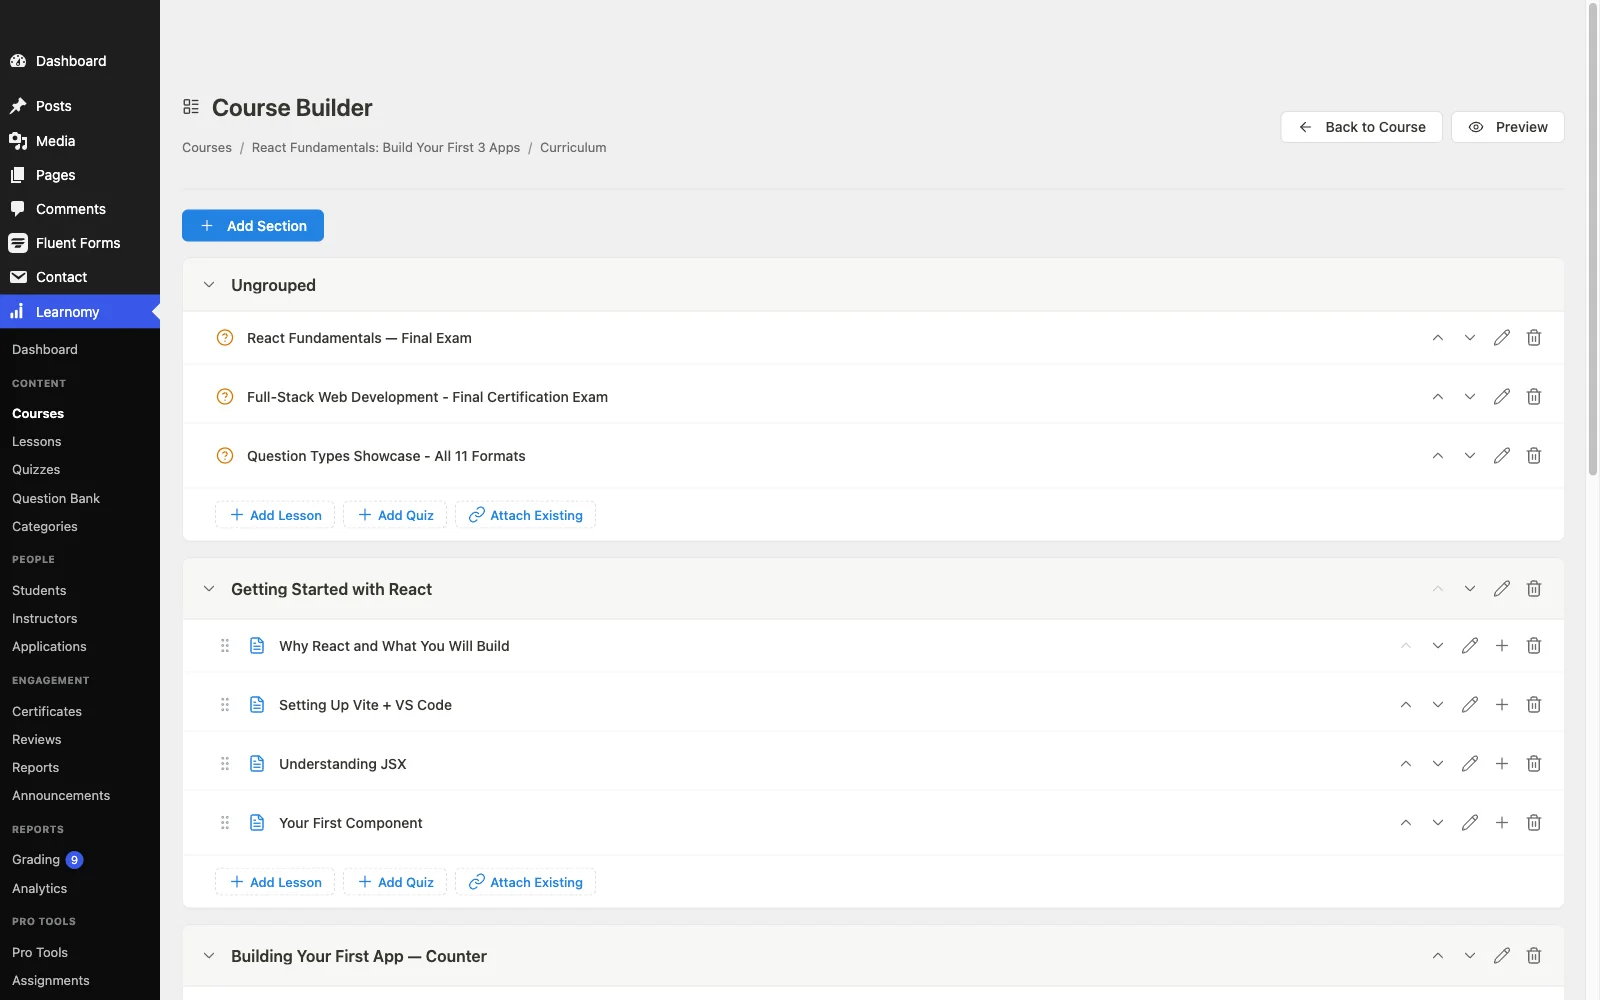
When a course has lessons or quizzes that do not belong to any section, the builder groups them at the top under a heading called Ungrouped. These items display directly under the course for students, in their saved order, with no chapter heading.
This is how flat courses work. It is also what you see after importing a course whose source had no chapters. You can mix the two layouts: keep some content in the Ungrouped group and organize the rest into sections.
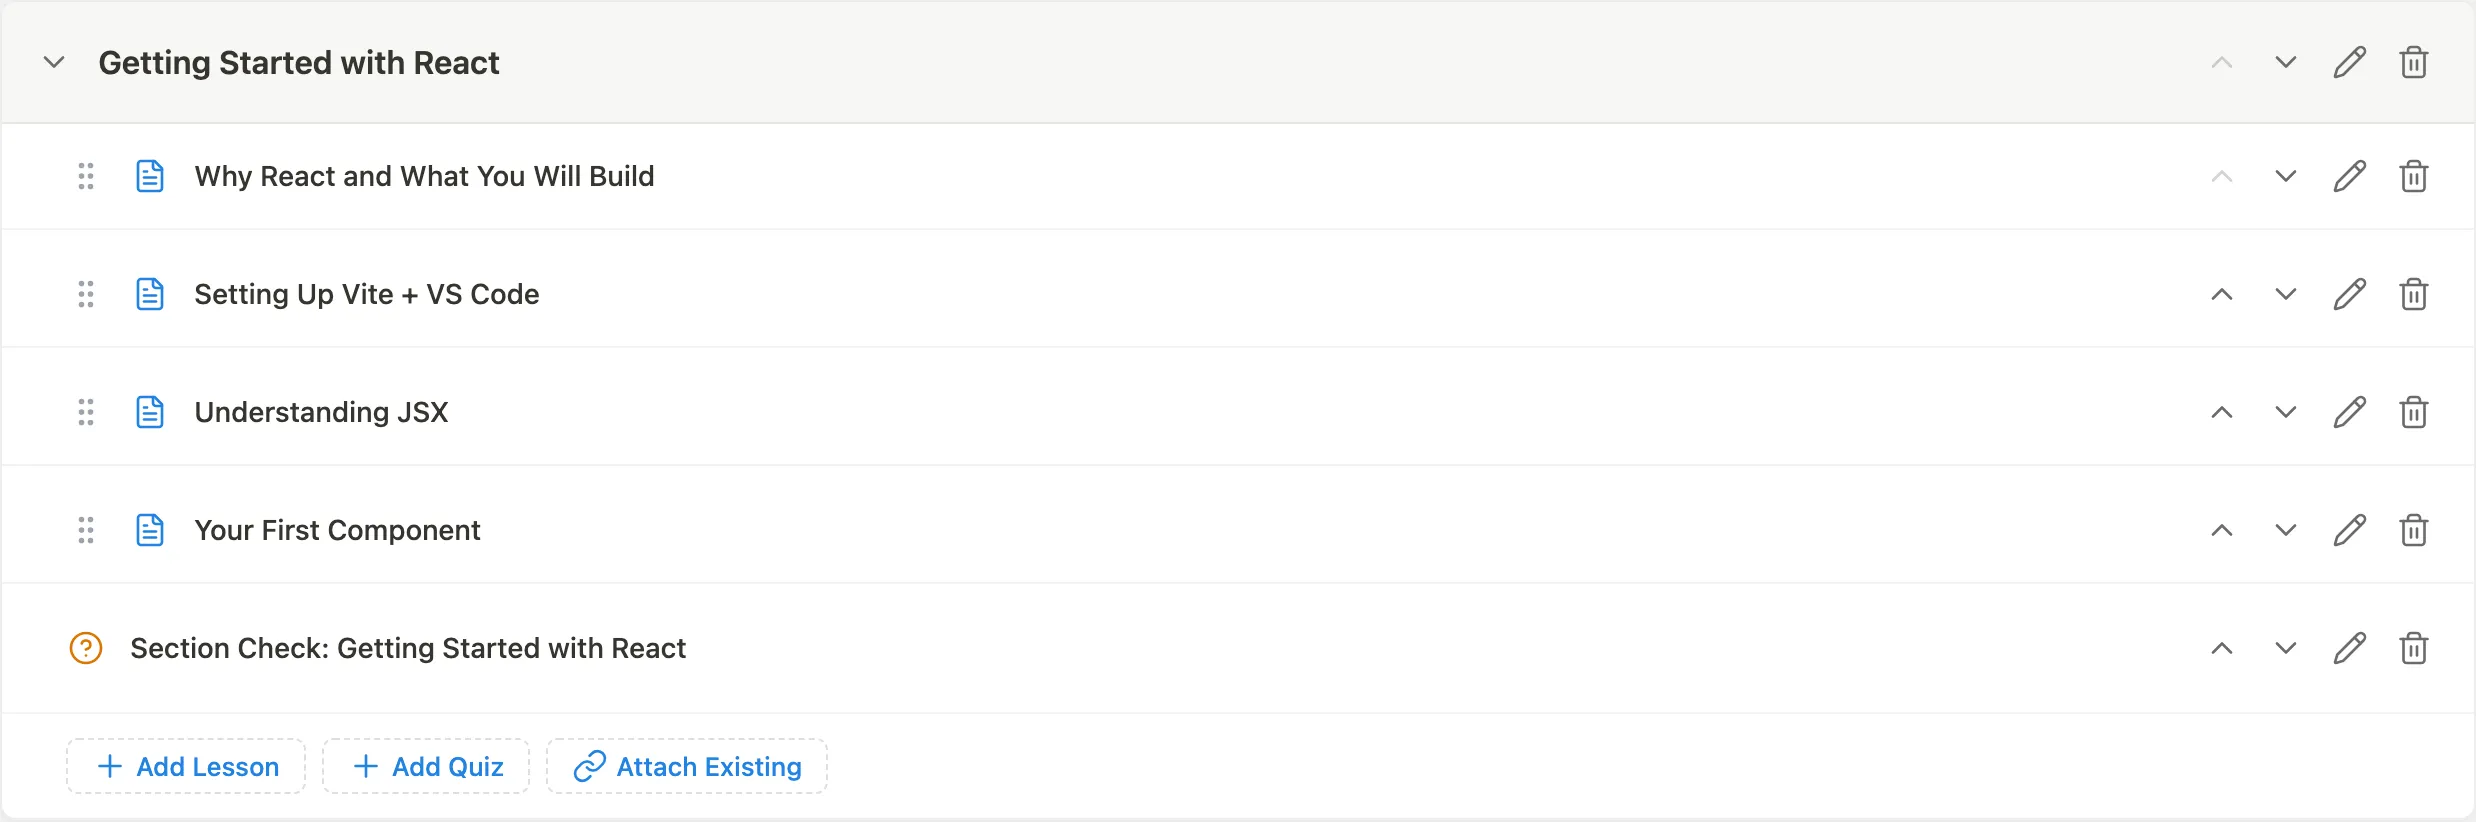
Adding lessons
Inside each section, click Add Lesson to create a new lesson or Add Existing to attach a lesson that already exists in the system.
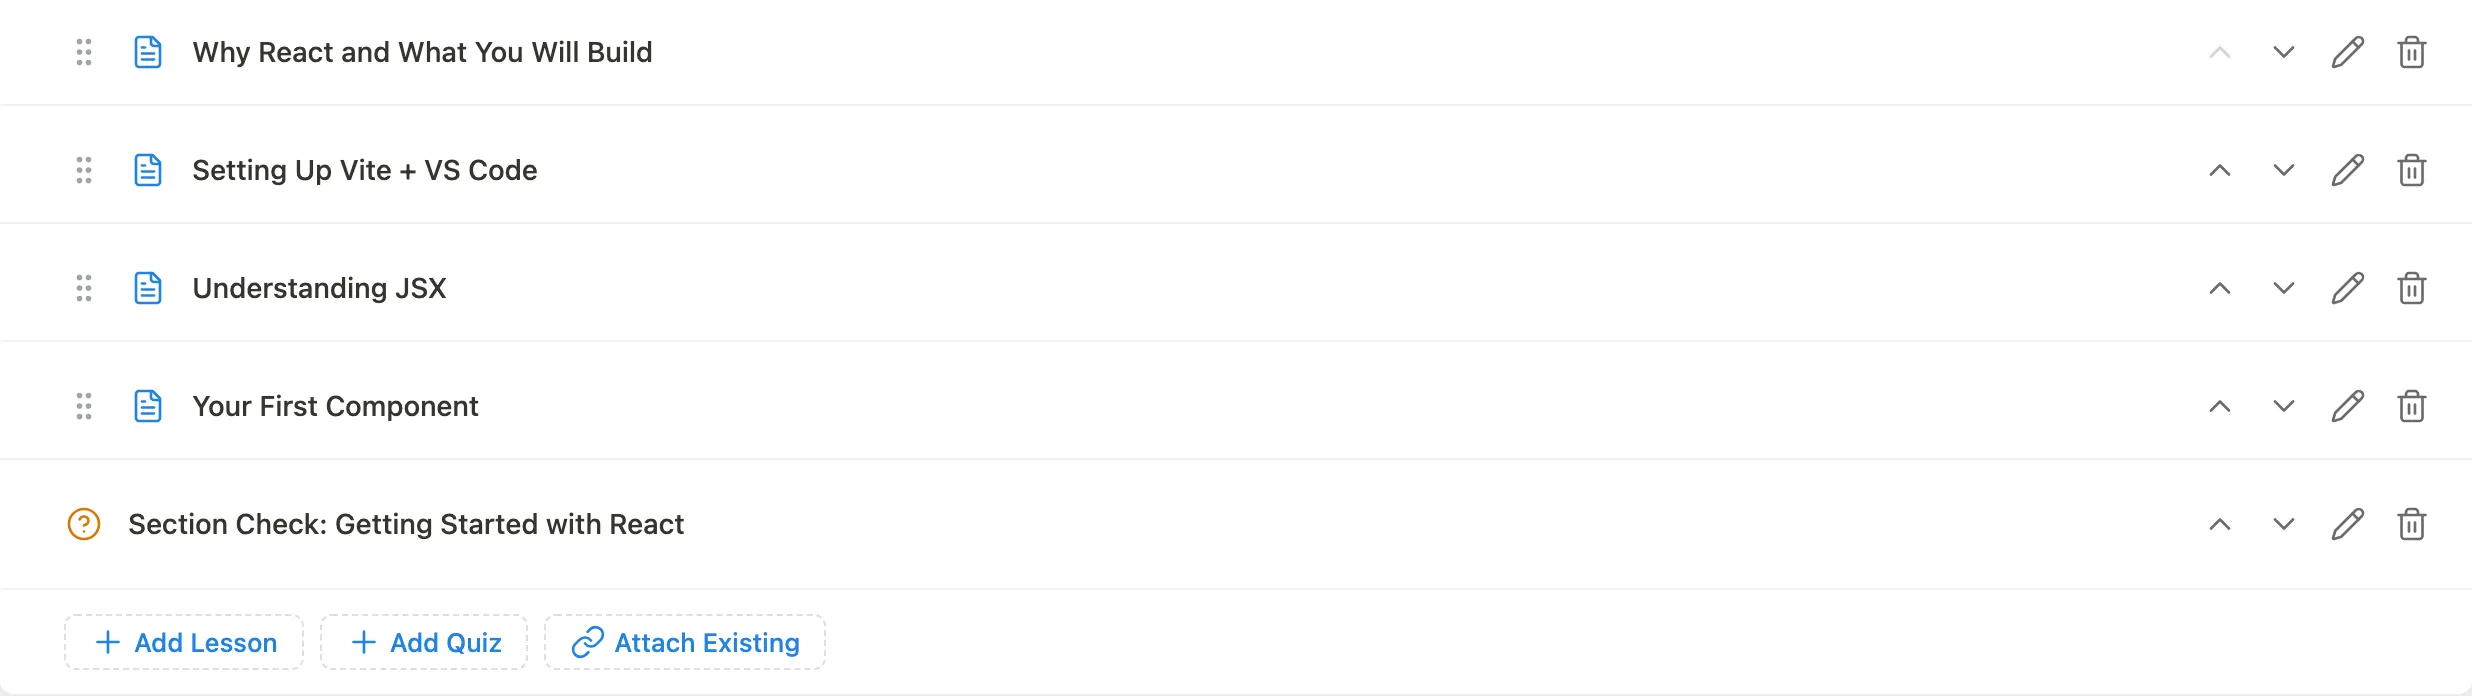
Lessons can be reordered within a section by dragging. They can also be moved between sections.
Adding a quiz to a section
Click Add Quiz inside a section to attach an existing quiz as the section's assessment.
Empty state
If the course has no content yet, the builder shows an empty state. It explains that you can add a section to group lessons into chapters, or add lessons directly, because sections are optional.
Tips
- A course must have status Published to appear in the catalog. You can save as Draft and preview it before publishing.
- Once any paying student has enrolled, the pricing model cannot be changed. Plan your pricing before your first promotion.
- The course builder saves changes immediately via the REST API; there is no separate Save button in the builder.
- The course form's Instructors card lets a site administrator reassign the lead author (the primary instructor) and add co-instructors. The card shows only when Allow multiple instructors per course is enabled. Co-instructors can see analytics and student progress, but only the primary instructor receives commission. See Managing Instructors for the full reassignment steps.
- Tags are separate from categories. You can add course tags in Learnomy → Categories and assign them from the course form.