
Use case walkthrough
Free plugin onlyRun an invite-only private classroom with Learnomy
You run a hand-picked class and nothing about it is public. Maybe it is a leadership program for your own staff, a class a school runs for one cohort of students, or a client team an academy is onboarding. Nobody buys a seat on your site: you decide who is in, and everyone else should not even know the class exists.
What you'll use
Invite only pricing model
Invite-Only Courses →Closed pricing model
Closed Course Pricing →Pricing and access models
Pricing and Access Models →Private course visibility
Creating a Course →Private site (site-wide)
General Settings →Bulk enroll from a list
Bulk Enroll from a List →Incoming enrollment webhook
Incoming Enrollment Webhook →Coupons
Coupons →The walkthrough
Phase 1 - Pick the access model
Open the course editor's Pricing & Access section. This is the core decision for a private classroom, and Learnomy gives you three ways to keep a course out of the on-site checkout, plus the normal paid models if the class should actually be for sale:
Your options here:
- Invite only (you add the students) - nothing is shown for sale. No price field, no URL field, no Buy button anywhere. You add every student yourself, by email or CSV. Pick this when there is no sale at all: internal training, a school running its own class, an academy onboarding a client's team.
- Access granted externally (closed) - also not sold on this site, but the course keeps an optional button that links to wherever it actually is sold (your own checkout elsewhere, Gumroad, a CRM, a sales team). Pick this when money changes hands, just not here, and you want to grant access after the fact by hand, by CSV, or through the incoming enrollment webhook.
- Free, plus turning the whole site private (covered in Phase 2) - anyone signed in can self-enroll for free, but logged-out visitors are redirected to the login page for the entire site. Pick this when you want a normal self-serve enrollment flow, just gated behind an account, rather than hand-adding every student.
- The five paid models (one-time, fixed-term, recurring, members only, one-time or members) still apply if part of your classroom should actually be for sale. A private classroom is not required to be free or unpaid; it is required to keep the wrong people out.
For a hand-picked class, pick Invite only. On the model site, "Aurora Leadership Circle" is set to it: a leadership development program for staff moving into their first people-management role, with every participant added by the program lead.
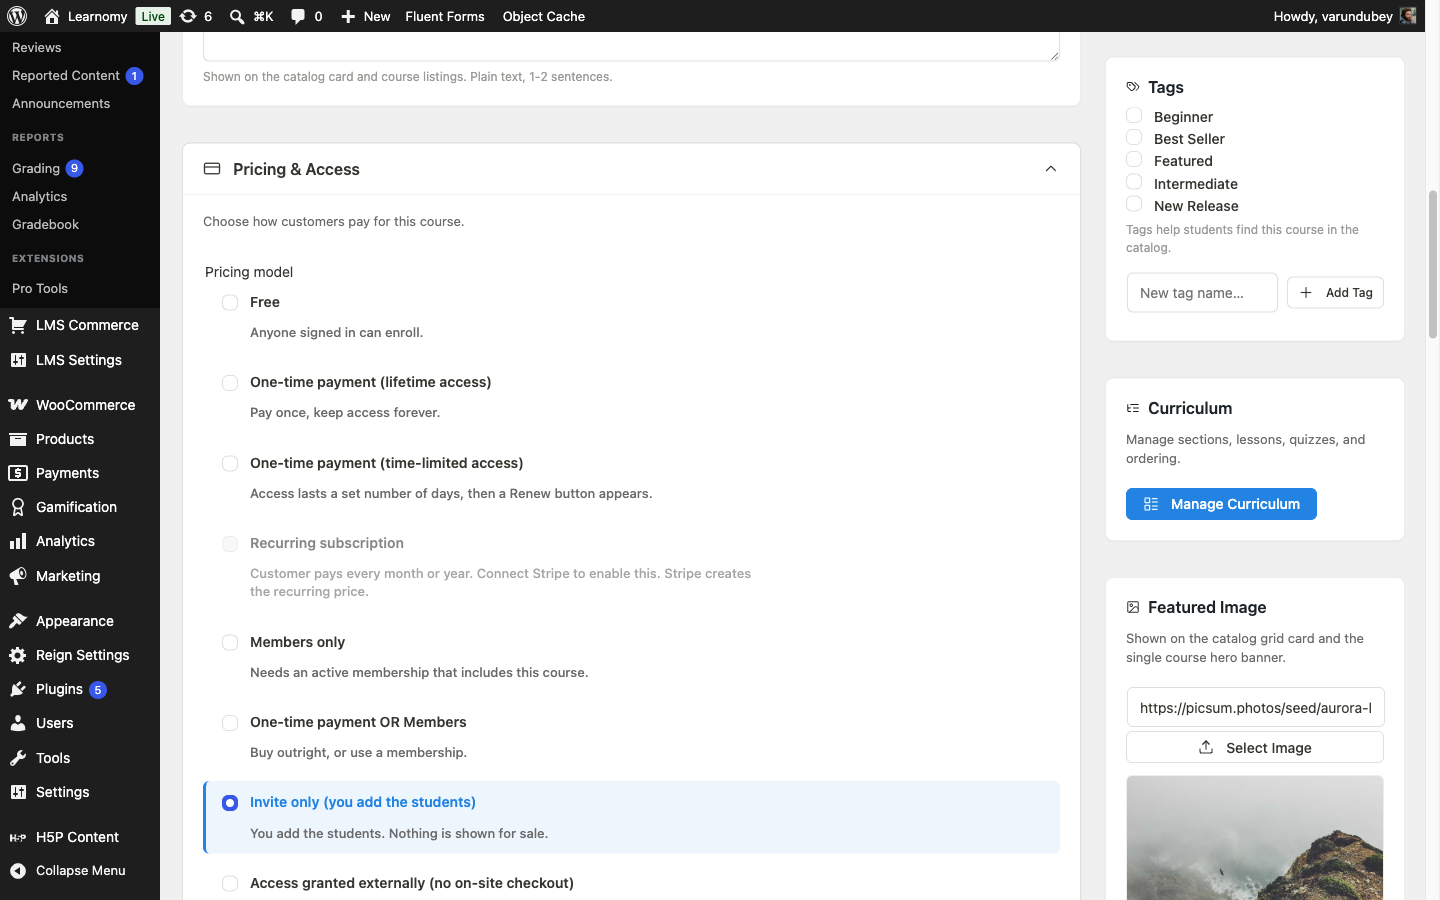
A second course, "Aurora Alumni Masterclass," is set to Closed instead, because it is genuinely sold elsewhere (the Aurora Alumni Network) and access is granted here once someone pays there. Invite only and Closed answer the same access question the same way underneath: nobody can enroll themselves, and the on-site checkout refuses both. They differ only in whether there is a sale to point at.
Phase 2 - Decide how much to hide
Keeping a class off the checkout is not the same as keeping it off the site. Learnomy separates the two, and this classroom's other decision point is how much you hide:
Your options here:
- Per-course Visibility (Private) - set on the individual course, in the same editor as Pricing & Access. A logged-out visitor who requests the course page gets a plain not found result: the course does not appear to exist at all. A signed-in visitor without access sees the invite-only or closed messaging instead. Pick this when only some of your catalog is private and the rest should stay a normal public academy.
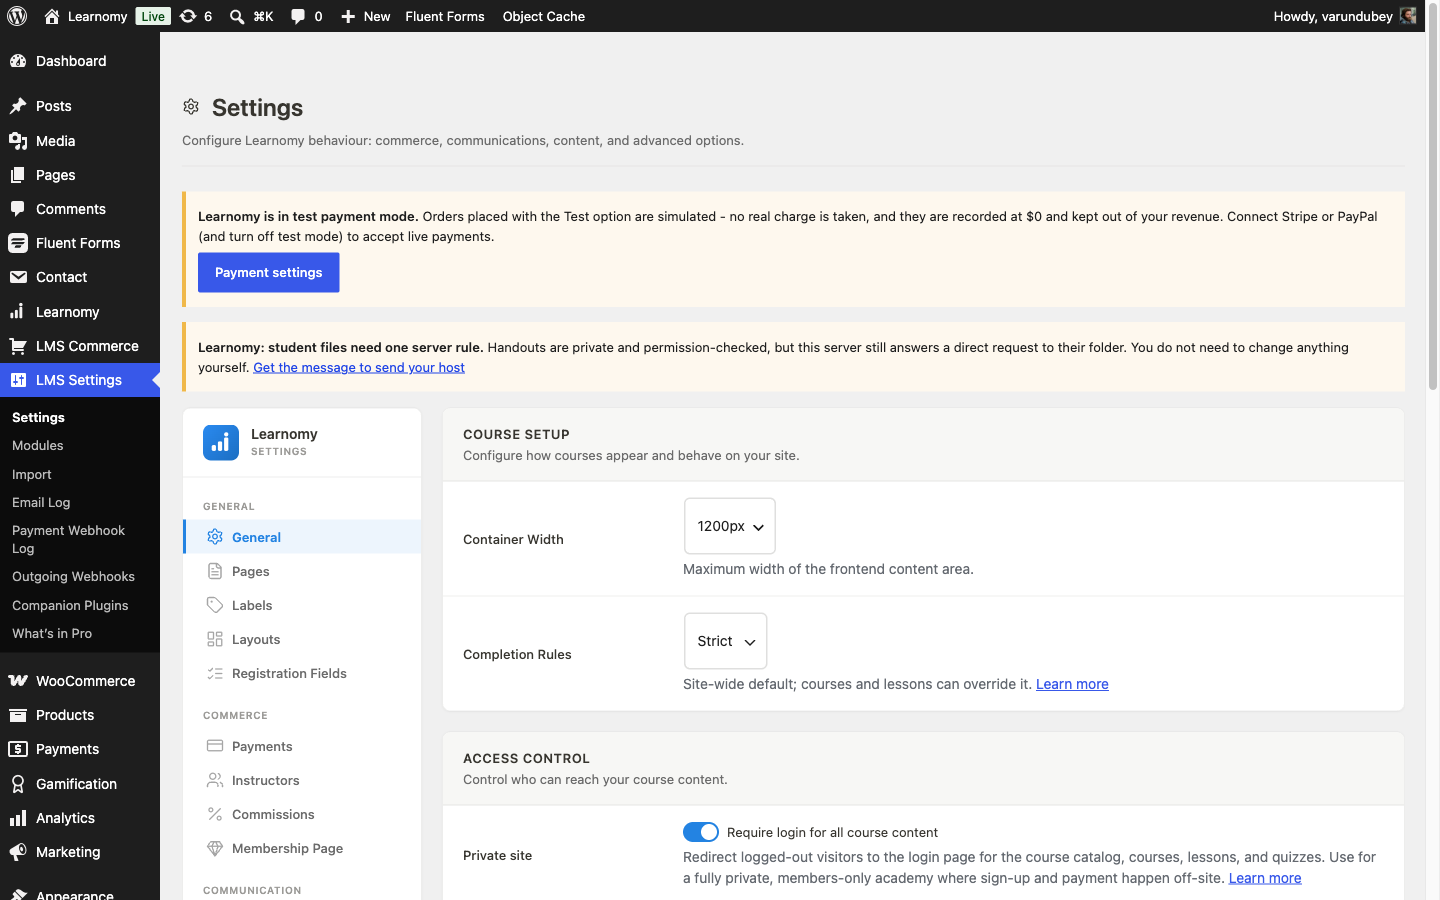
- Private site (site-wide) - a single toggle at LMS Settings > Settings > Access Control. Every logged-out visitor is redirected to the login page for the catalog, every course, every lesson, and every quiz, and the REST API and sitemap stop serving course and category data to anonymous callers too. Pick this when the whole academy is closed to the public and everyone who needs it already has, or will be given, an account. Corporate Internal Training walks this toggle for a whole-company training portal; this guide covers the same switch for contrast, then turns it back off, since here only two courses out of the catalog are private.
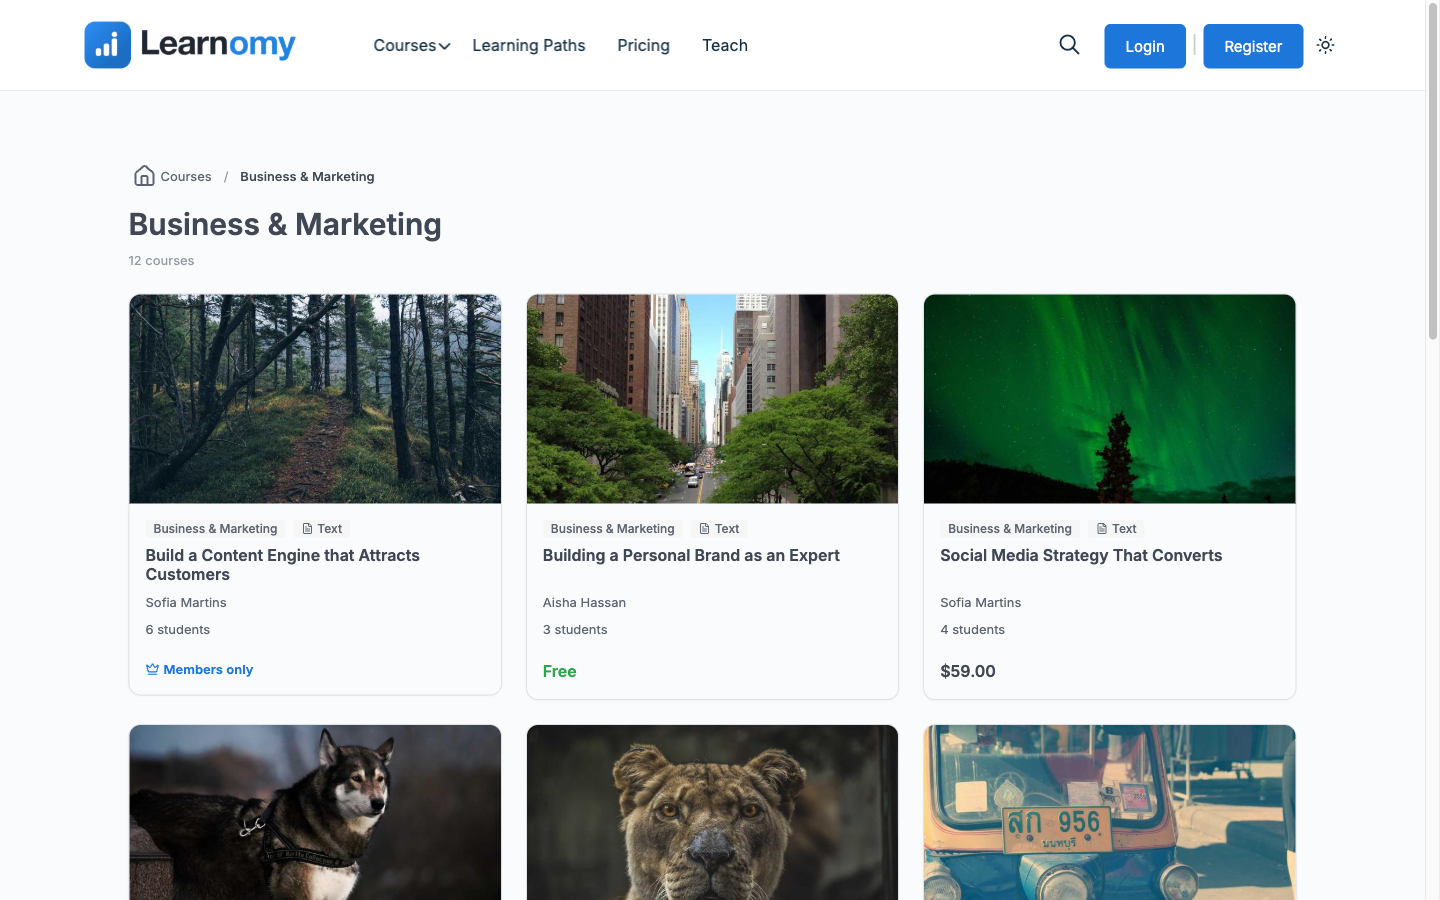
Both vignette courses use per-course Visibility set to Private, which is the better fit when the rest of your catalog stays public. Logged out, the catalog lists 66 other courses and neither "Aurora Leadership Circle" nor "Aurora Alumni Masterclass" appears anywhere in it, including in their own "Business & Marketing" category, which still shows its 12 other, public courses:
To see the site-wide alternative, we turned on Private site at LMS Settings > Settings > Access Control for this capture, which redirects every anonymous request for a course, category, or the catalog to the login page instead of quietly 404ing one course:
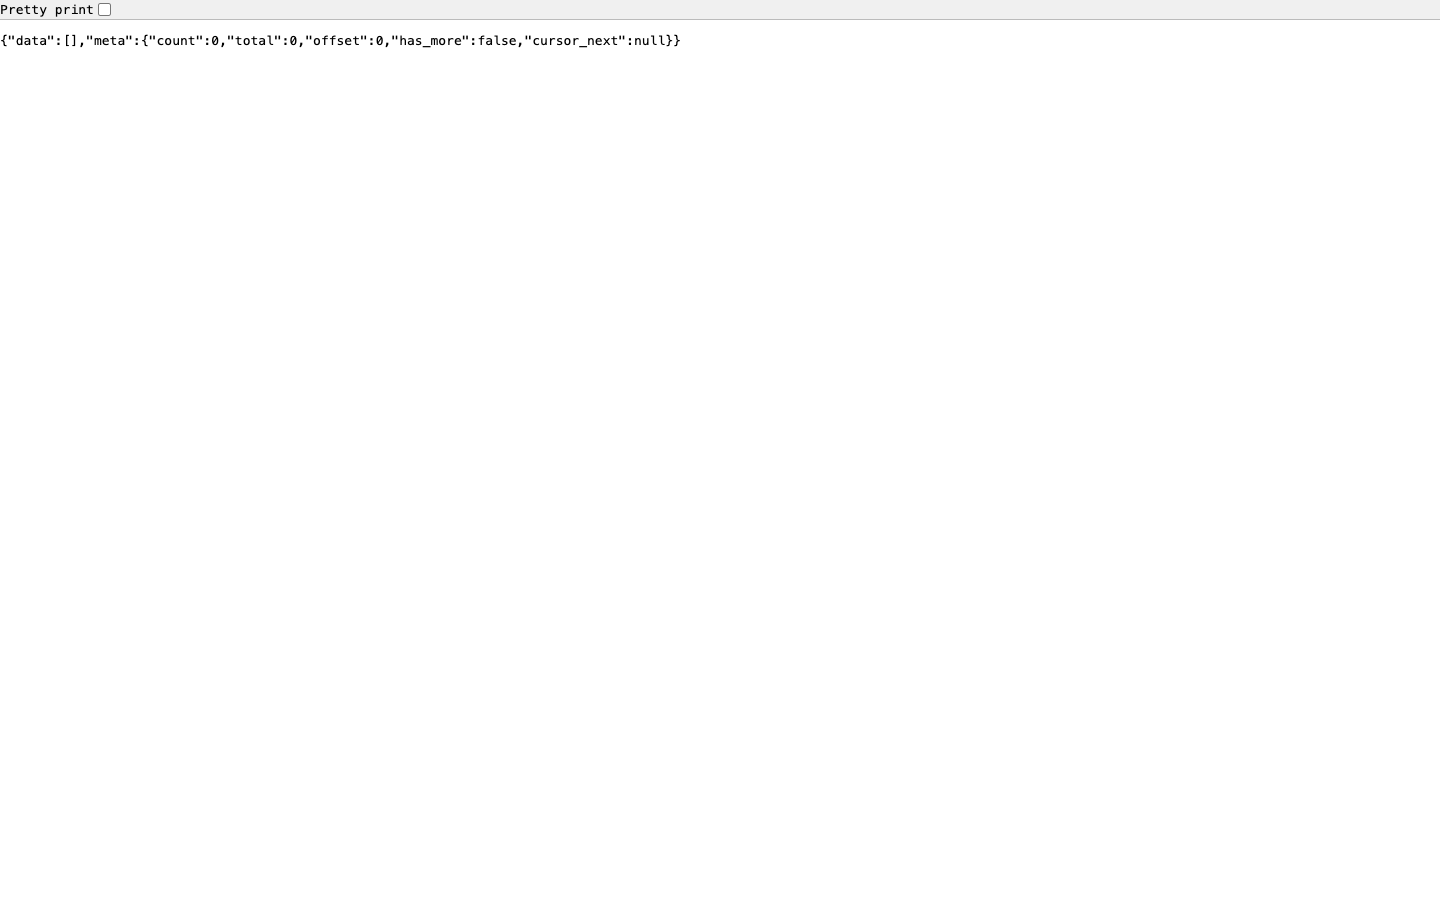
It also empties both public category endpoints for an anonymous caller, so a department or client name in a category cannot leak to someone who is not logged in:
We then turned Private site back off for the rest of this walkthrough, since this classroom's other 66 courses are meant to stay public. If your whole academy is private, leave the site-wide toggle on instead of setting Visibility on every course by hand.
Phase 3 - Get your students in
With the model chosen and the course hidden the way you want, decide how people actually get in. There is no self-enrollment on an invite-only or closed course, so you have three ways to grant access, and you can combine them:
Your options here:
- Add one student by email or username - on the course detail screen
(Learnomy > Courses, then open the course), the Enroll a student
card takes a single email or username and enrolls them immediately with
source = manual, no payment involved. Pick this for a handful of people or a one-off addition. - Bulk enroll from a list (CSV / emails) - the same card has a collapsible row that accepts a pasted list or an uploaded CSV of up to 500 addresses at once, creating accounts for anyone who does not already have one. Pick this for a real roster: a whole cohort, a department, a client team. See Bulk Enroll from a List.
- The incoming enrollment webhook - for a Closed course specifically,
connect your external checkout, Gumroad, a CRM, or Zapier/Make to
POST /wp-json/learnomy/v1/webhooks/enrollment, signed with a secret you set on LMS Settings > Webhooks. The buyer is enrolled automatically the moment your external system reports a sale, and revoked the same way on a refund. Pick this when access should follow a sale you cannot see from inside Learnomy. It only manages closed courses; sending it an invite-only or normal course ID is rejected. See Incoming Enrollment Webhook.
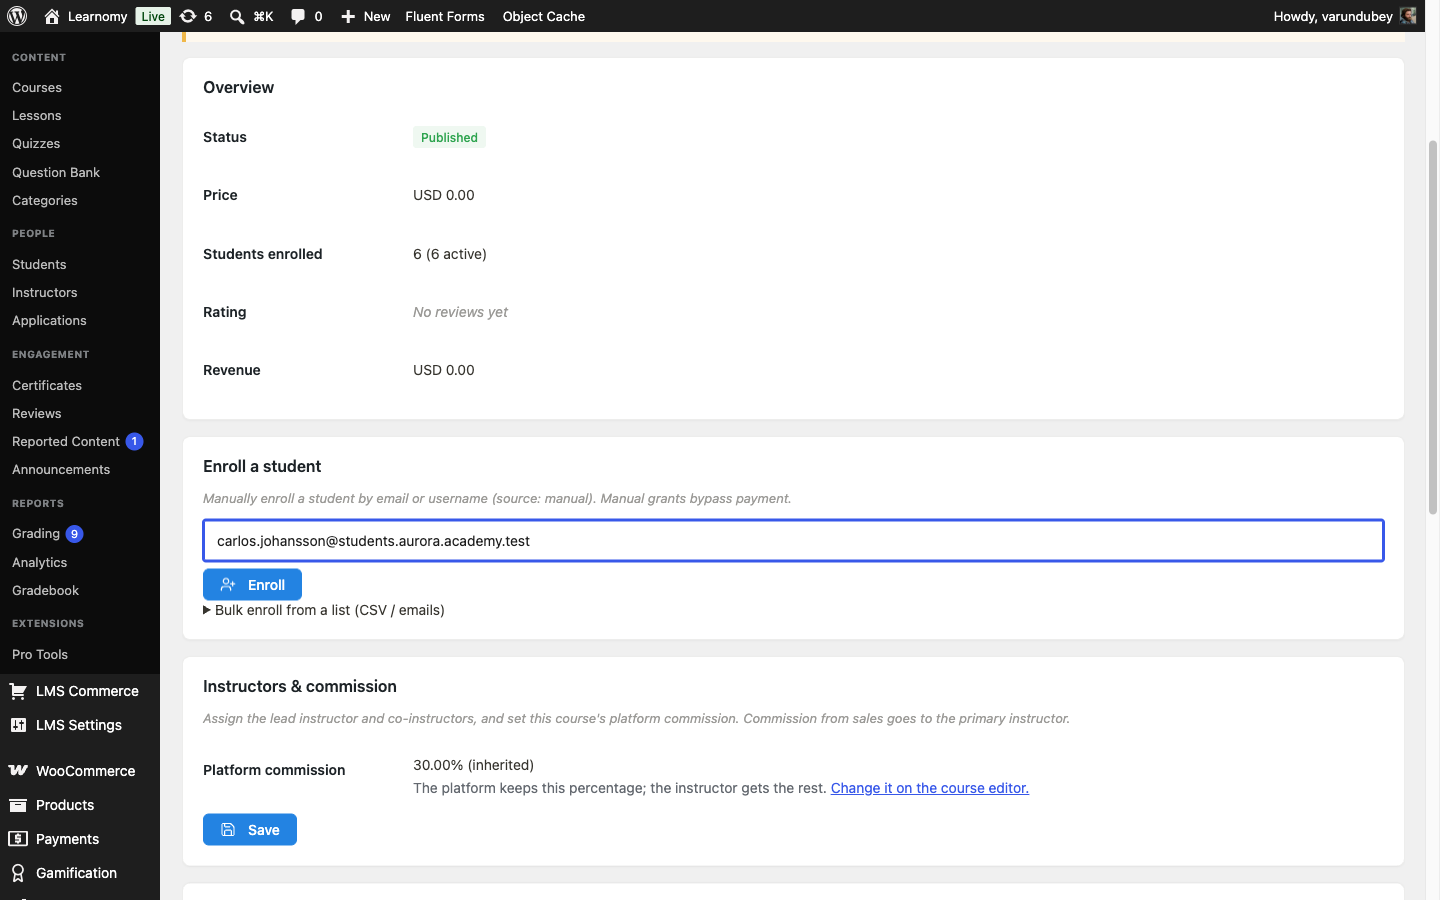
We added a student to "Aurora Leadership Circle" by email from the course detail screen: the same card that shows six students already enrolled, plus the collapsible bulk-enroll row for a full roster.
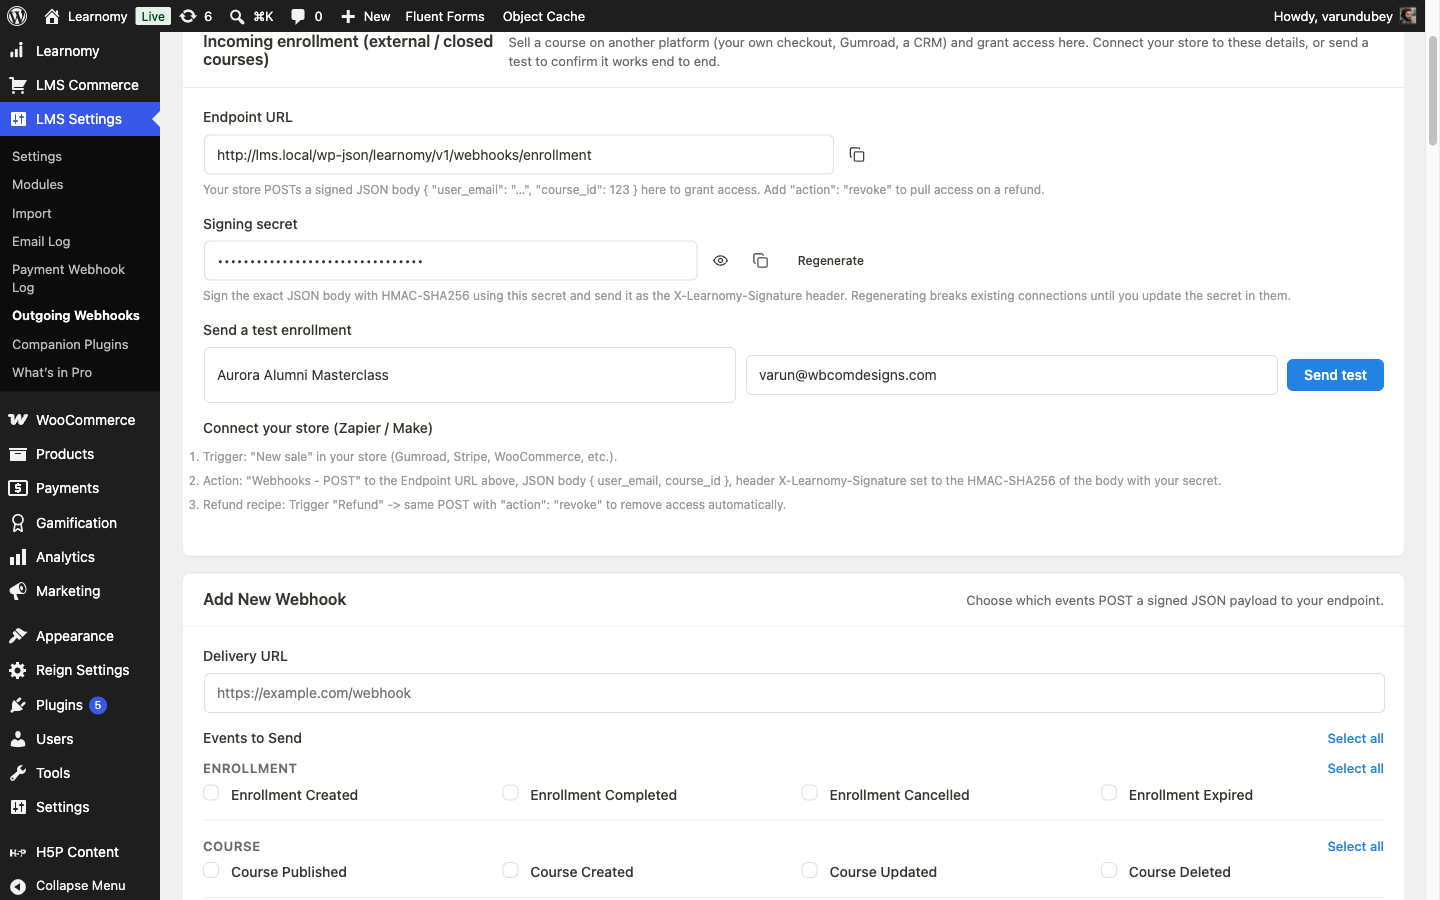
"Aurora Alumni Masterclass" already has one member, added the other way: the model site's Webhooks screen shows the Incoming Enrollment panel with that course pre-selected in the Send a test enrollment row, because it is the only closed course on the site right now. This is what an alumni network's checkout, or a Zapier "New sale" trigger, would call after a real purchase.
A fourth pattern is worth knowing even though it is not one of the three access models above: a 100%-off coupon lets you comp one specific student into a course that is otherwise sold normally, without touching that course's pricing model at all. This is not a dedicated gift-codes screen (that is a Pro feature for memberships, covered in Gift Codes and Team Seats); it is the same Coupons feature every course already has, scoped to 100% off and a single course. Use it when you want to give one person a free seat on a course everyone else still pays for, rather than converting the whole course to invite only.
Phase 4 - Test it as a student
Log out and confirm the class is invisible to a stranger, then log in as someone with access and confirm they reach it normally.
Verify it works
Log out, then request the checkout URL directly for the invite-only course:
http://your-site/enroll/?course_id=<id>. The page itself loads (it does not know yet which course you mean), but attempting to enroll redirects you to the login page first, the same as any checkout URL when you are signed out. Log in as a student who is not enrolled and open the same URL again: the page renders a normal-looking "Free Enrollment" card, because the course has no price, but clicking through returns the actual refusal: "This course does not accept direct enrollments. Access is granted for you rather than requested."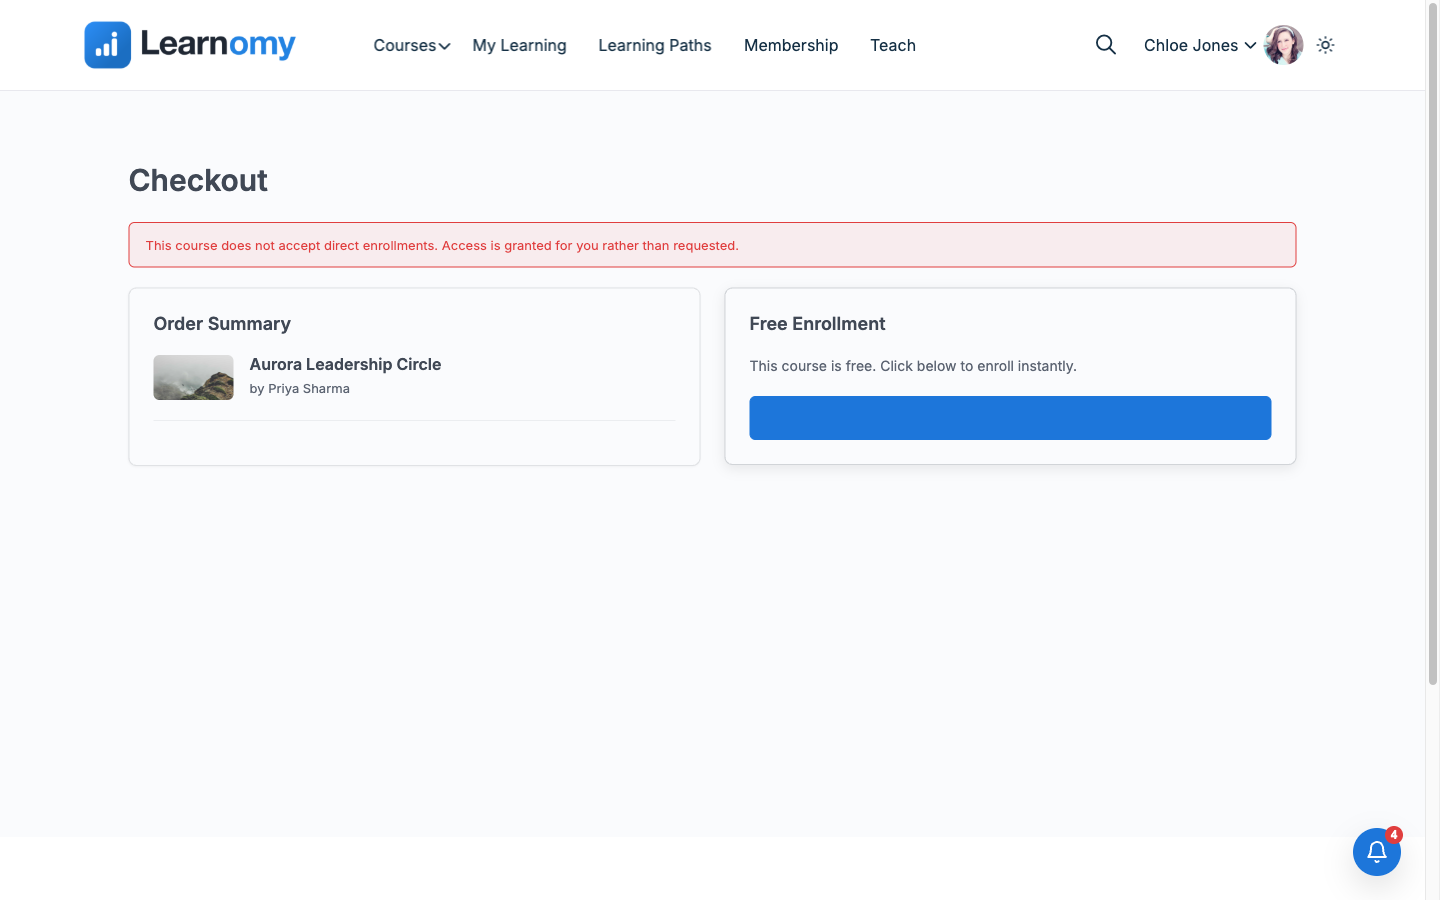
Checkout page showing the direct-enrollment refusal message Log in as a member the program lead already added and open
/courses/aurora-leadership-circle/. The page shows an Enrolled badge, real progress (65% complete on the model site), and a Continue learning link straight into the curriculum, exactly like any other course they had paid for.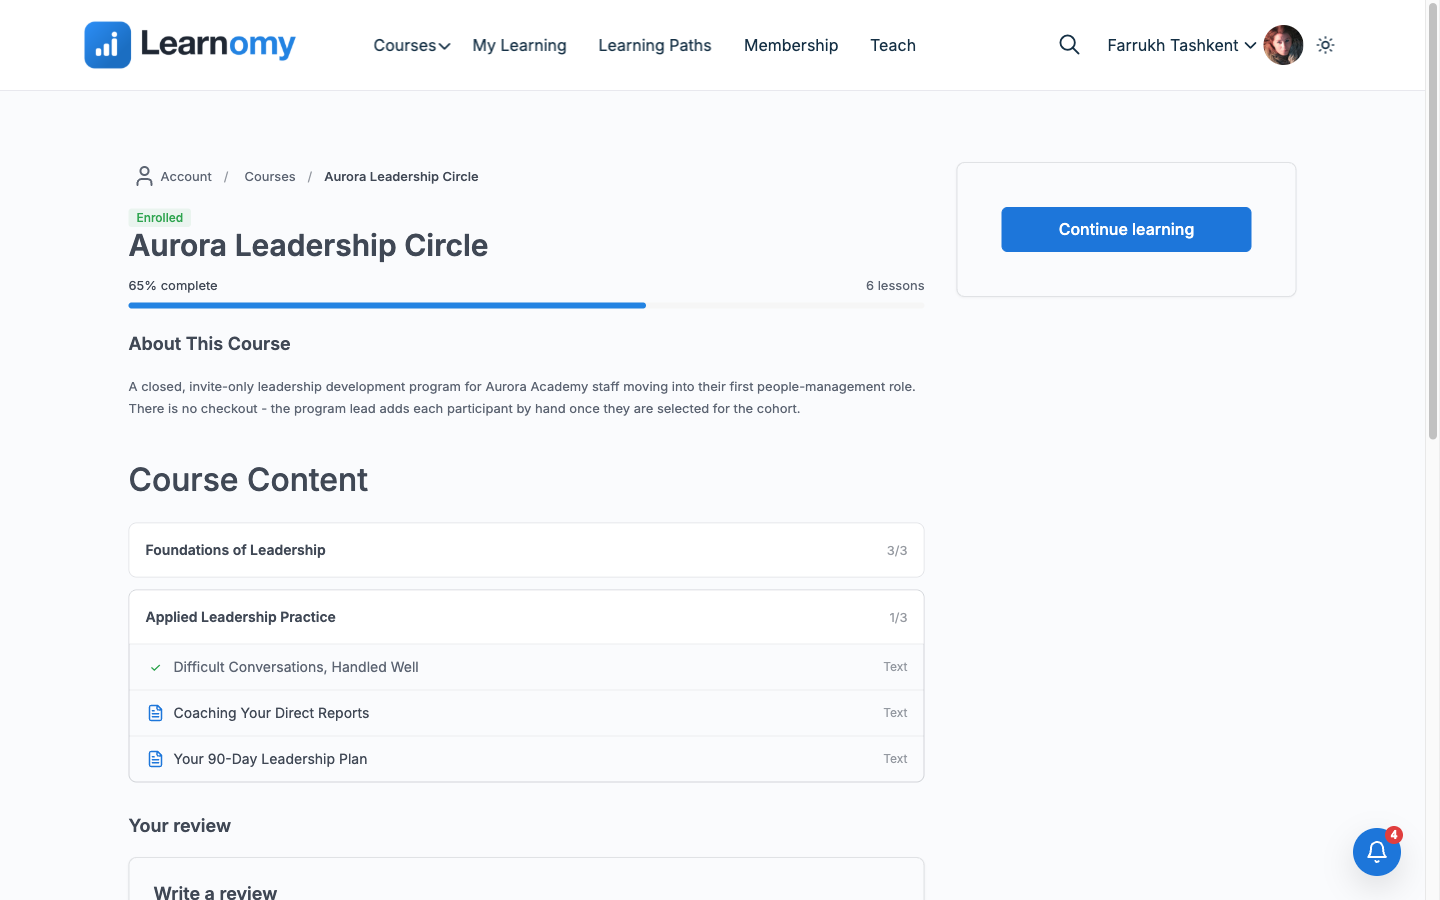
Enrolled member viewing Aurora Leadership Circle with progress and Continue learning The gift-coupon path (Phase 3's fourth pattern) also works end to end. As a fresh, not-yet-enrolled student, we opened checkout for "JavaScript Fundamentals for Web Developers" ($49, normally sold on-site) and applied
AURORAGIFT1. The coupon discounted the order to $0.00 and completing the free order enrolled Chloe immediately, withsource = purchaseand the coupon's usage count moving from 0 to 1. This depends on reaching Learnomy's own checkout page: with WooCommerce enabled as the gateway (this model site's default), the student would land in the WooCommerce cart instead, where the Learnomy coupon field does not appear -- turn the WooCommerce gateway off, or see Add courses to your WooCommerce store for how the two interact.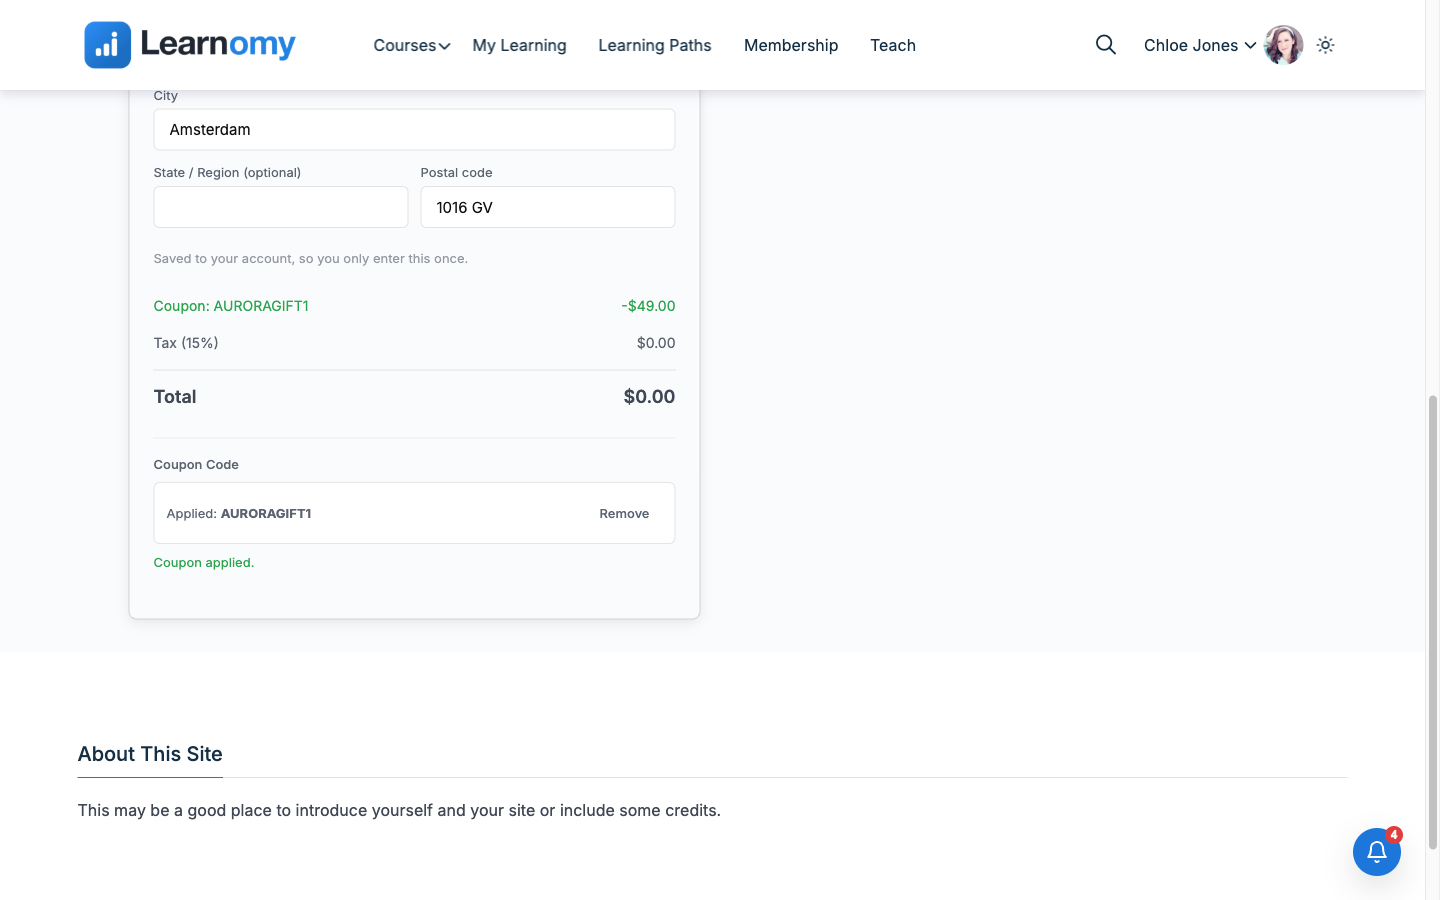
Coupon AURORAGIFT1 applied, dropping the total to zero Completing the order landed Chloe on the course page already enrolled, with no separate thank-you step needed for a zero-dollar order:
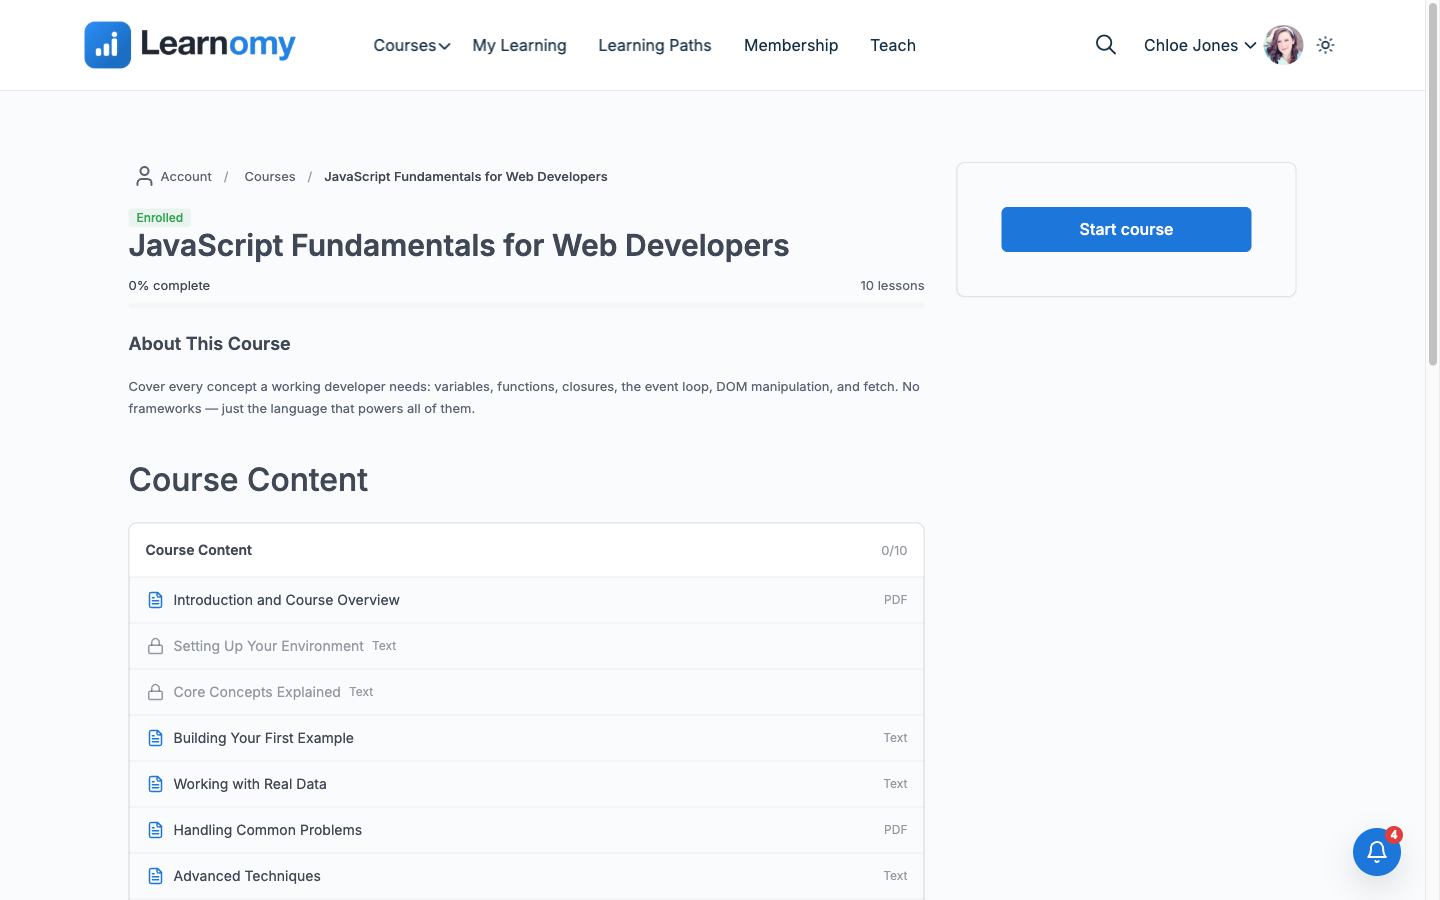
JavaScript Fundamentals course page after the gift-coupon order completed
Keep reading
Build this on your own site
Everything above runs on your WordPress server. Start with the free plugin; add Pro when a step here needs it.